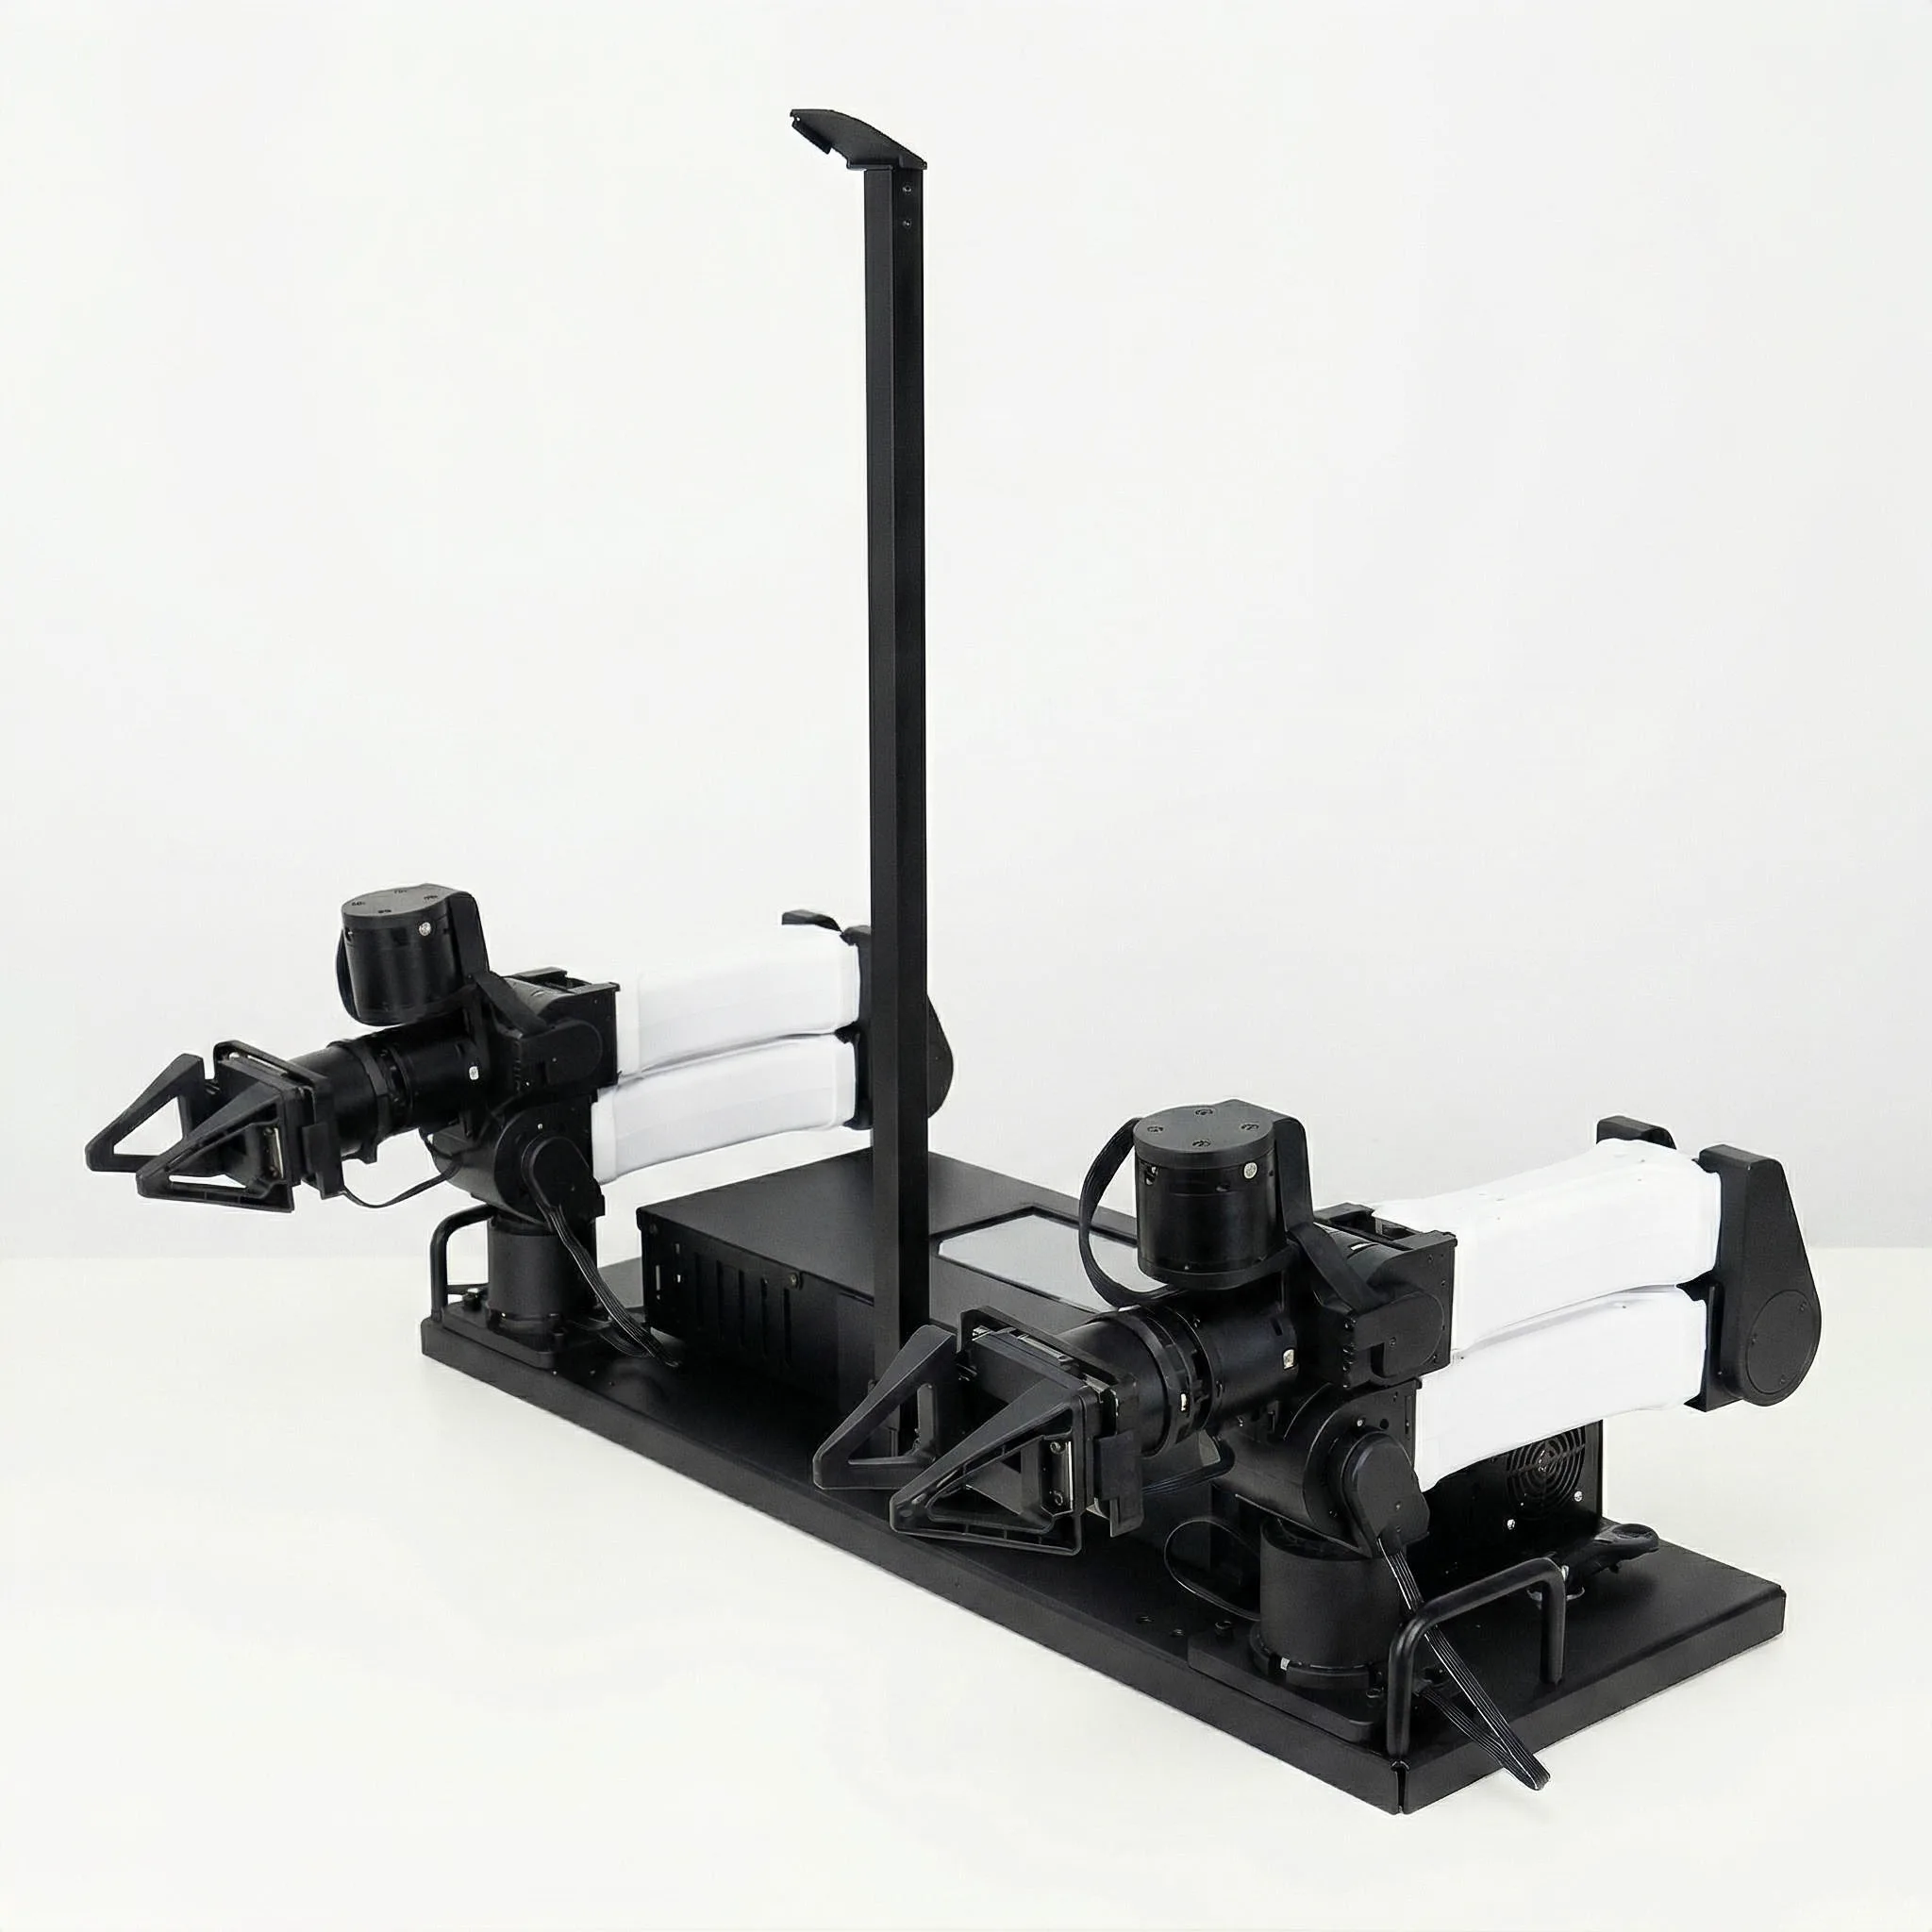
YAM Box
YAM Box is an all-in-one enclosed manipulation station built around the YAM arm family. It provides a self-contained, cable-managed workspace for manipulation research and automated data collection — with two follower arms, integrated cameras, and an on-board Mini PC running Ubuntu.
Code support not yet available
The YAM Box hardware is available for purchase. Software and SDK support is under active development and will be released in an upcoming update. Sign up at i2rt.com or join the Discord to be notified.
Overview
Intended Use Cases
- Automated data generation — Run unattended overnight collection campaigns without cable snagging.
- Demonstration stations — Clean, professional setup for trade shows and lab demos.
- Safe testing environments — Enclosed workspace limits accidental contact during development.
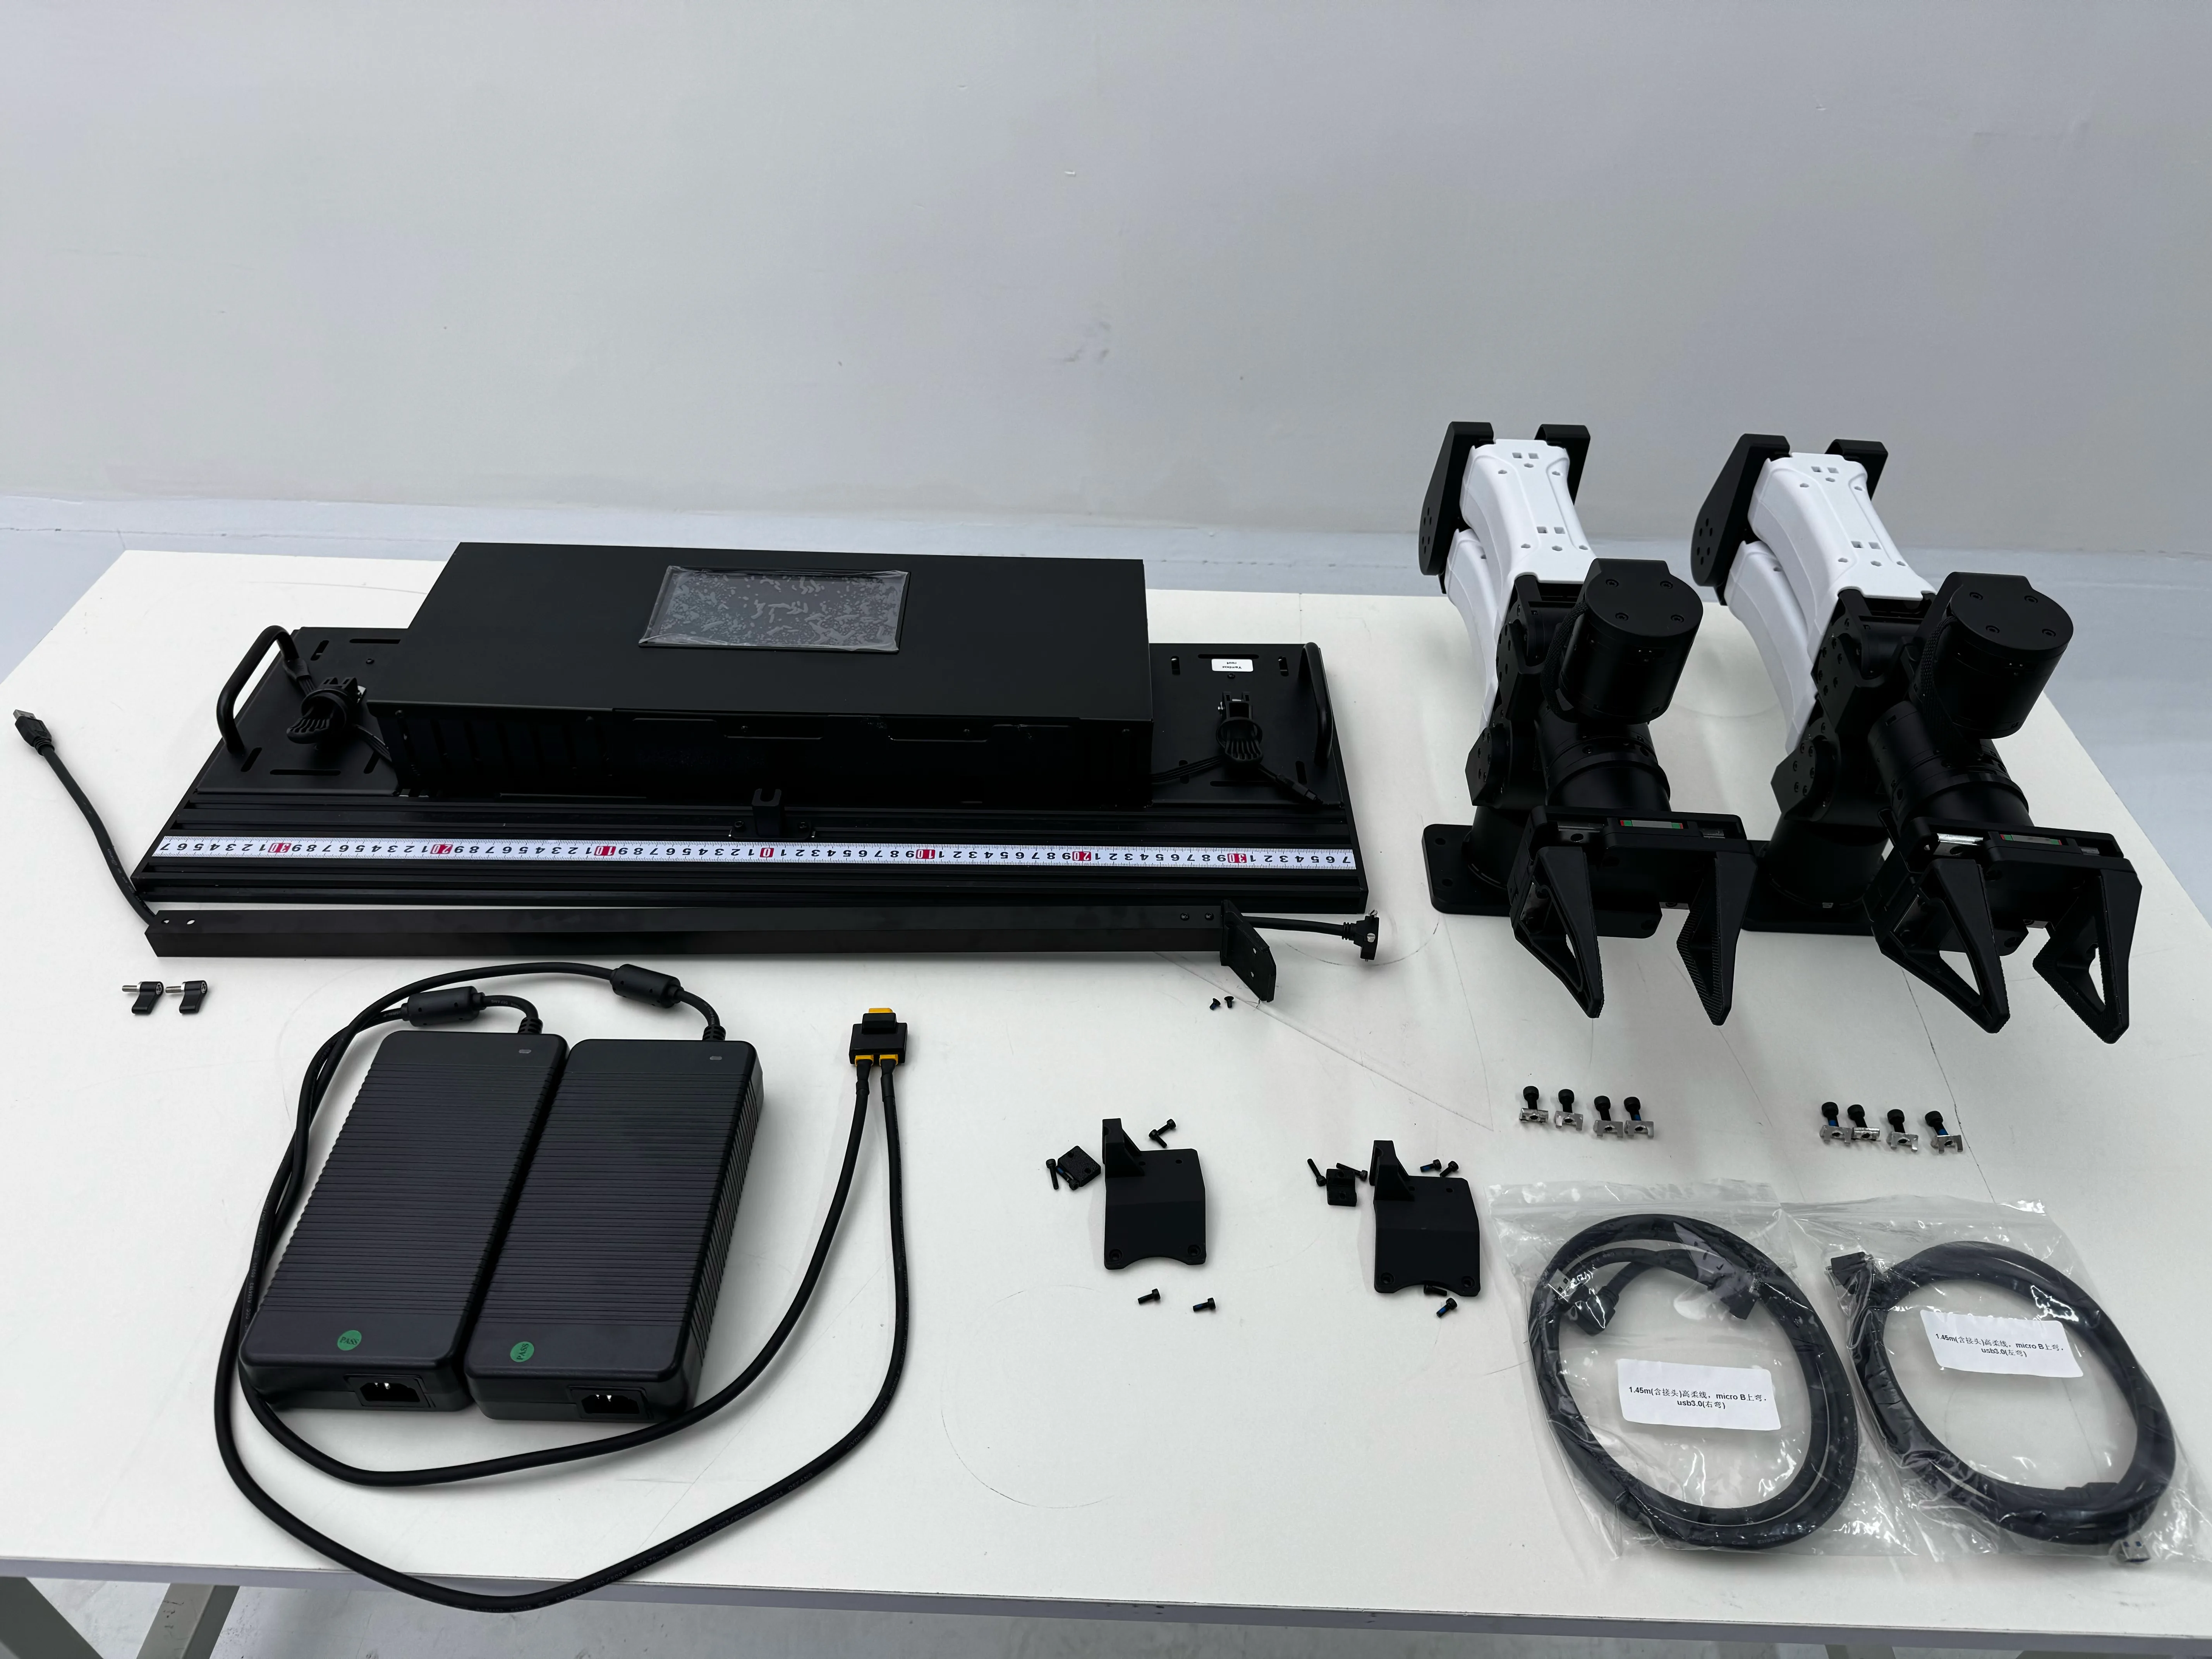
What's Inside
| Component | Details |
|---|---|
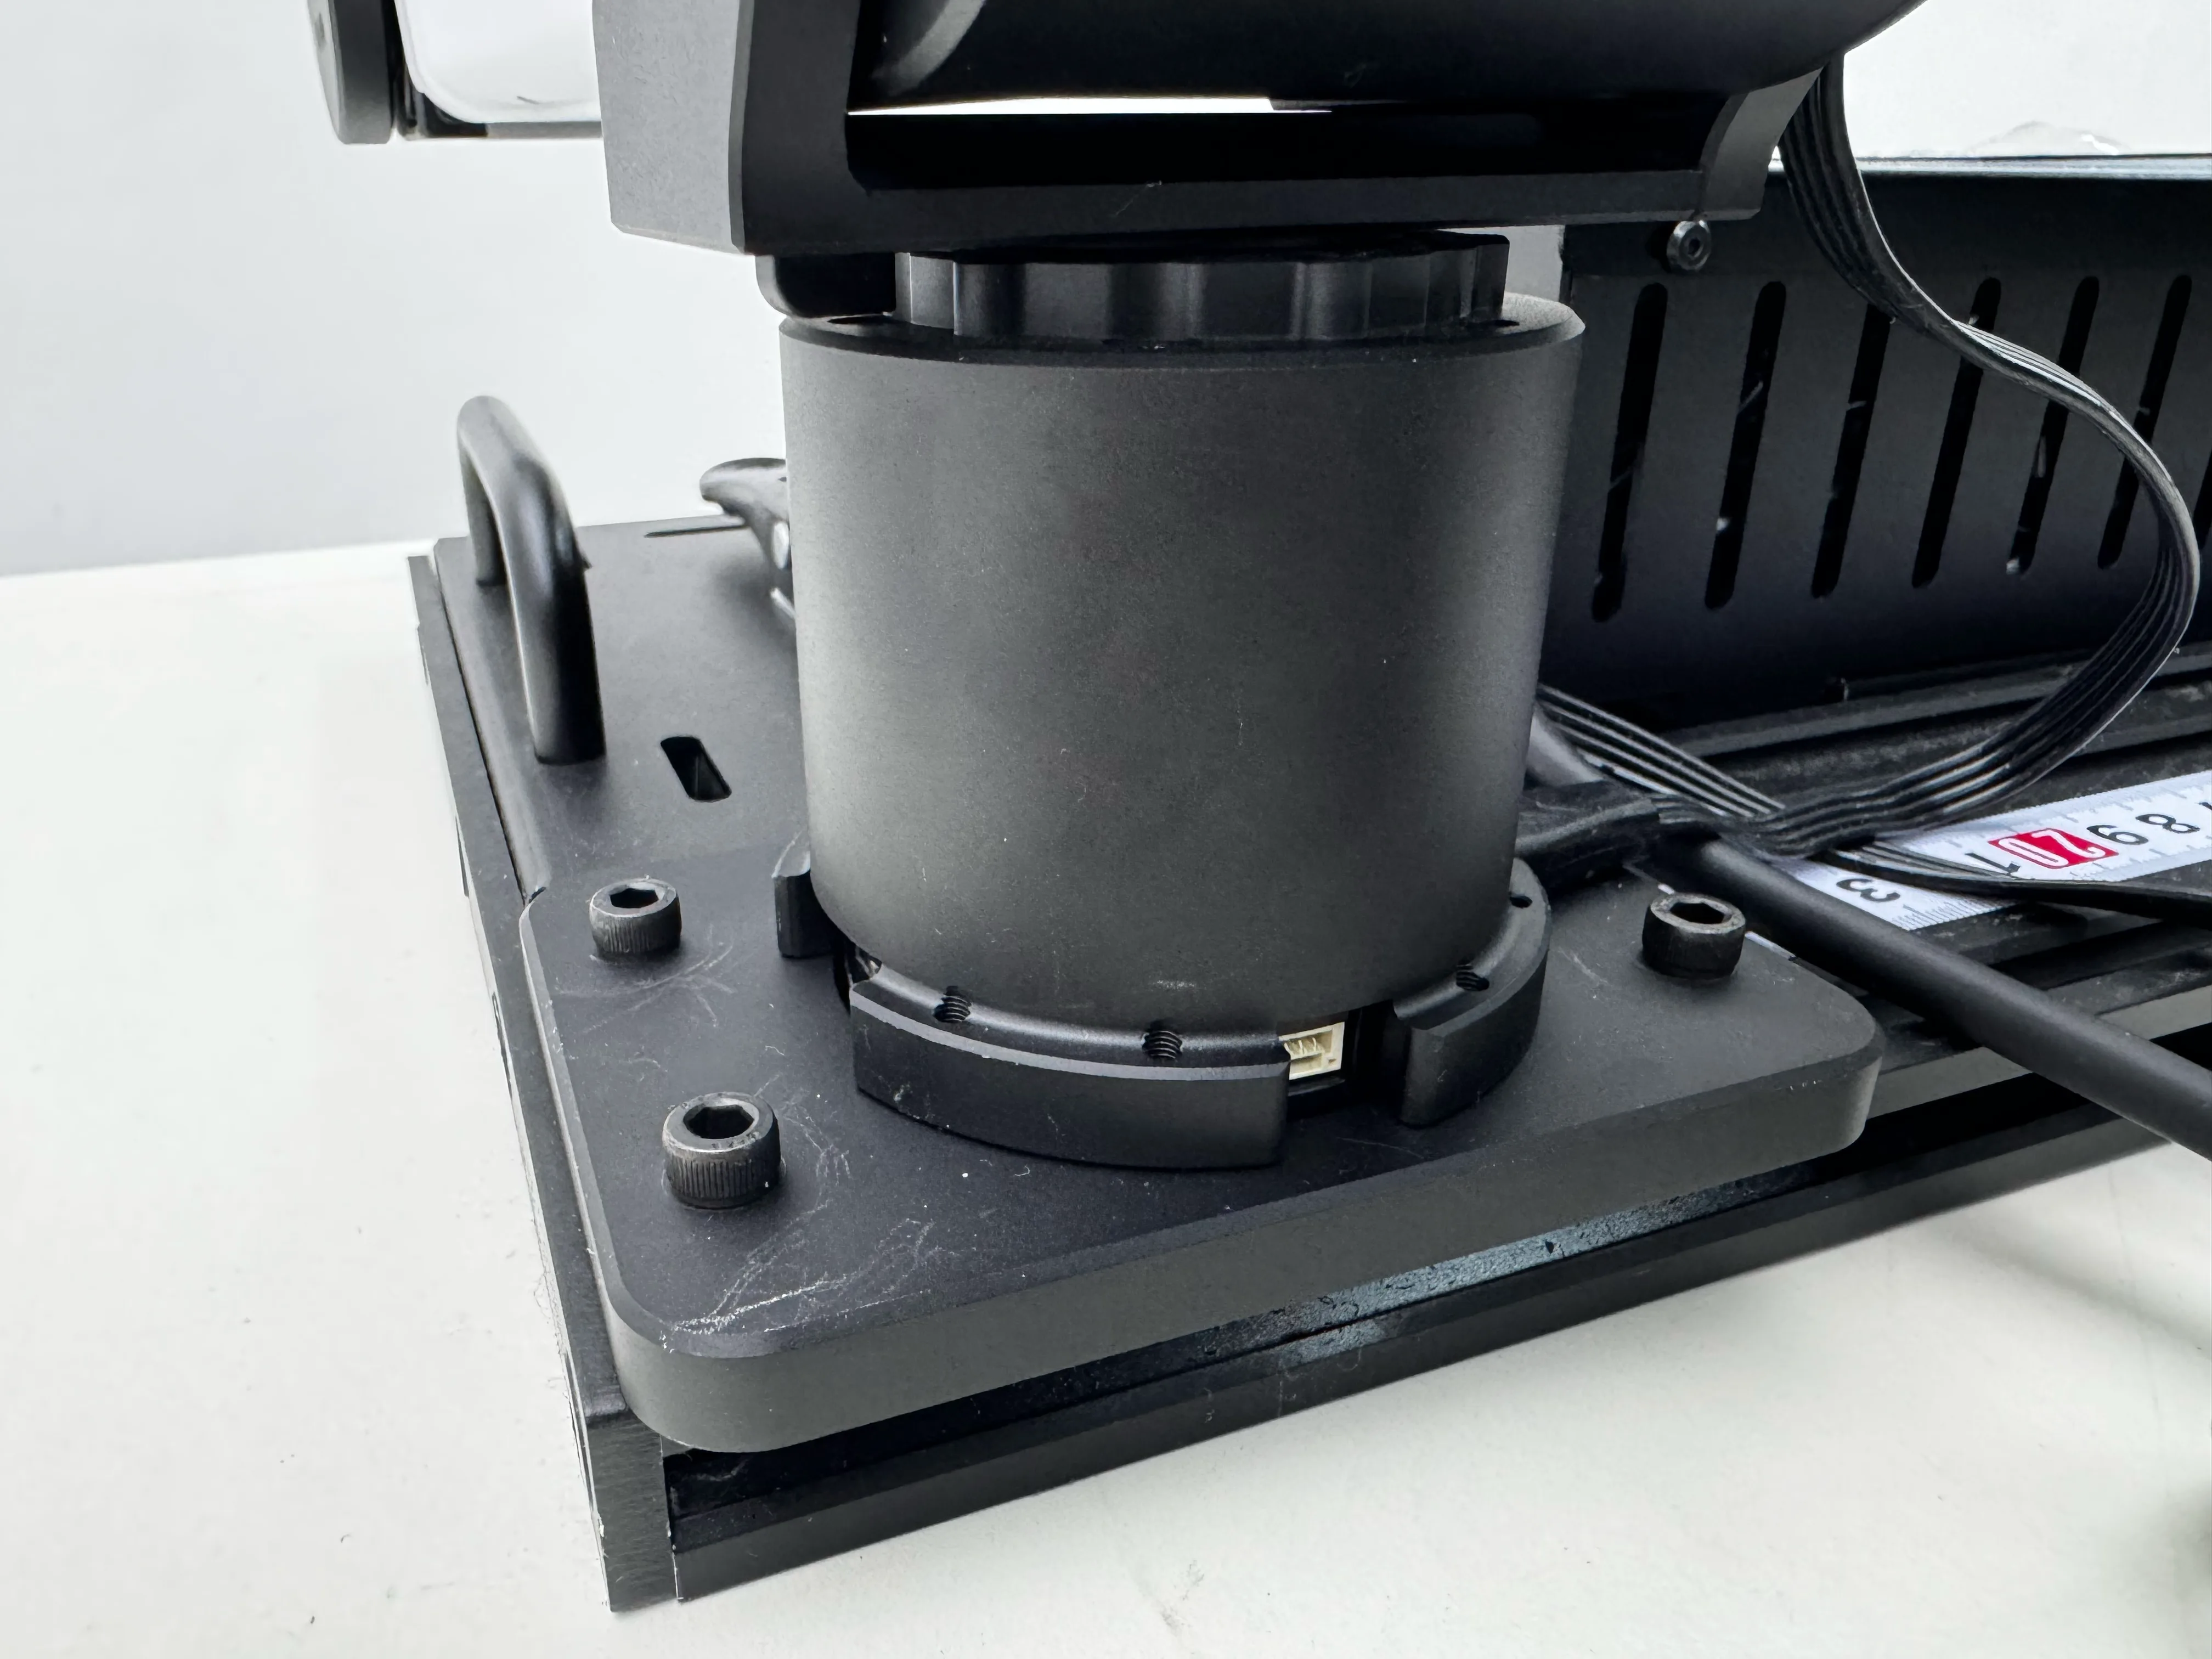
| YAM follower arms | 2× YAM arms mounted on left and right sides |
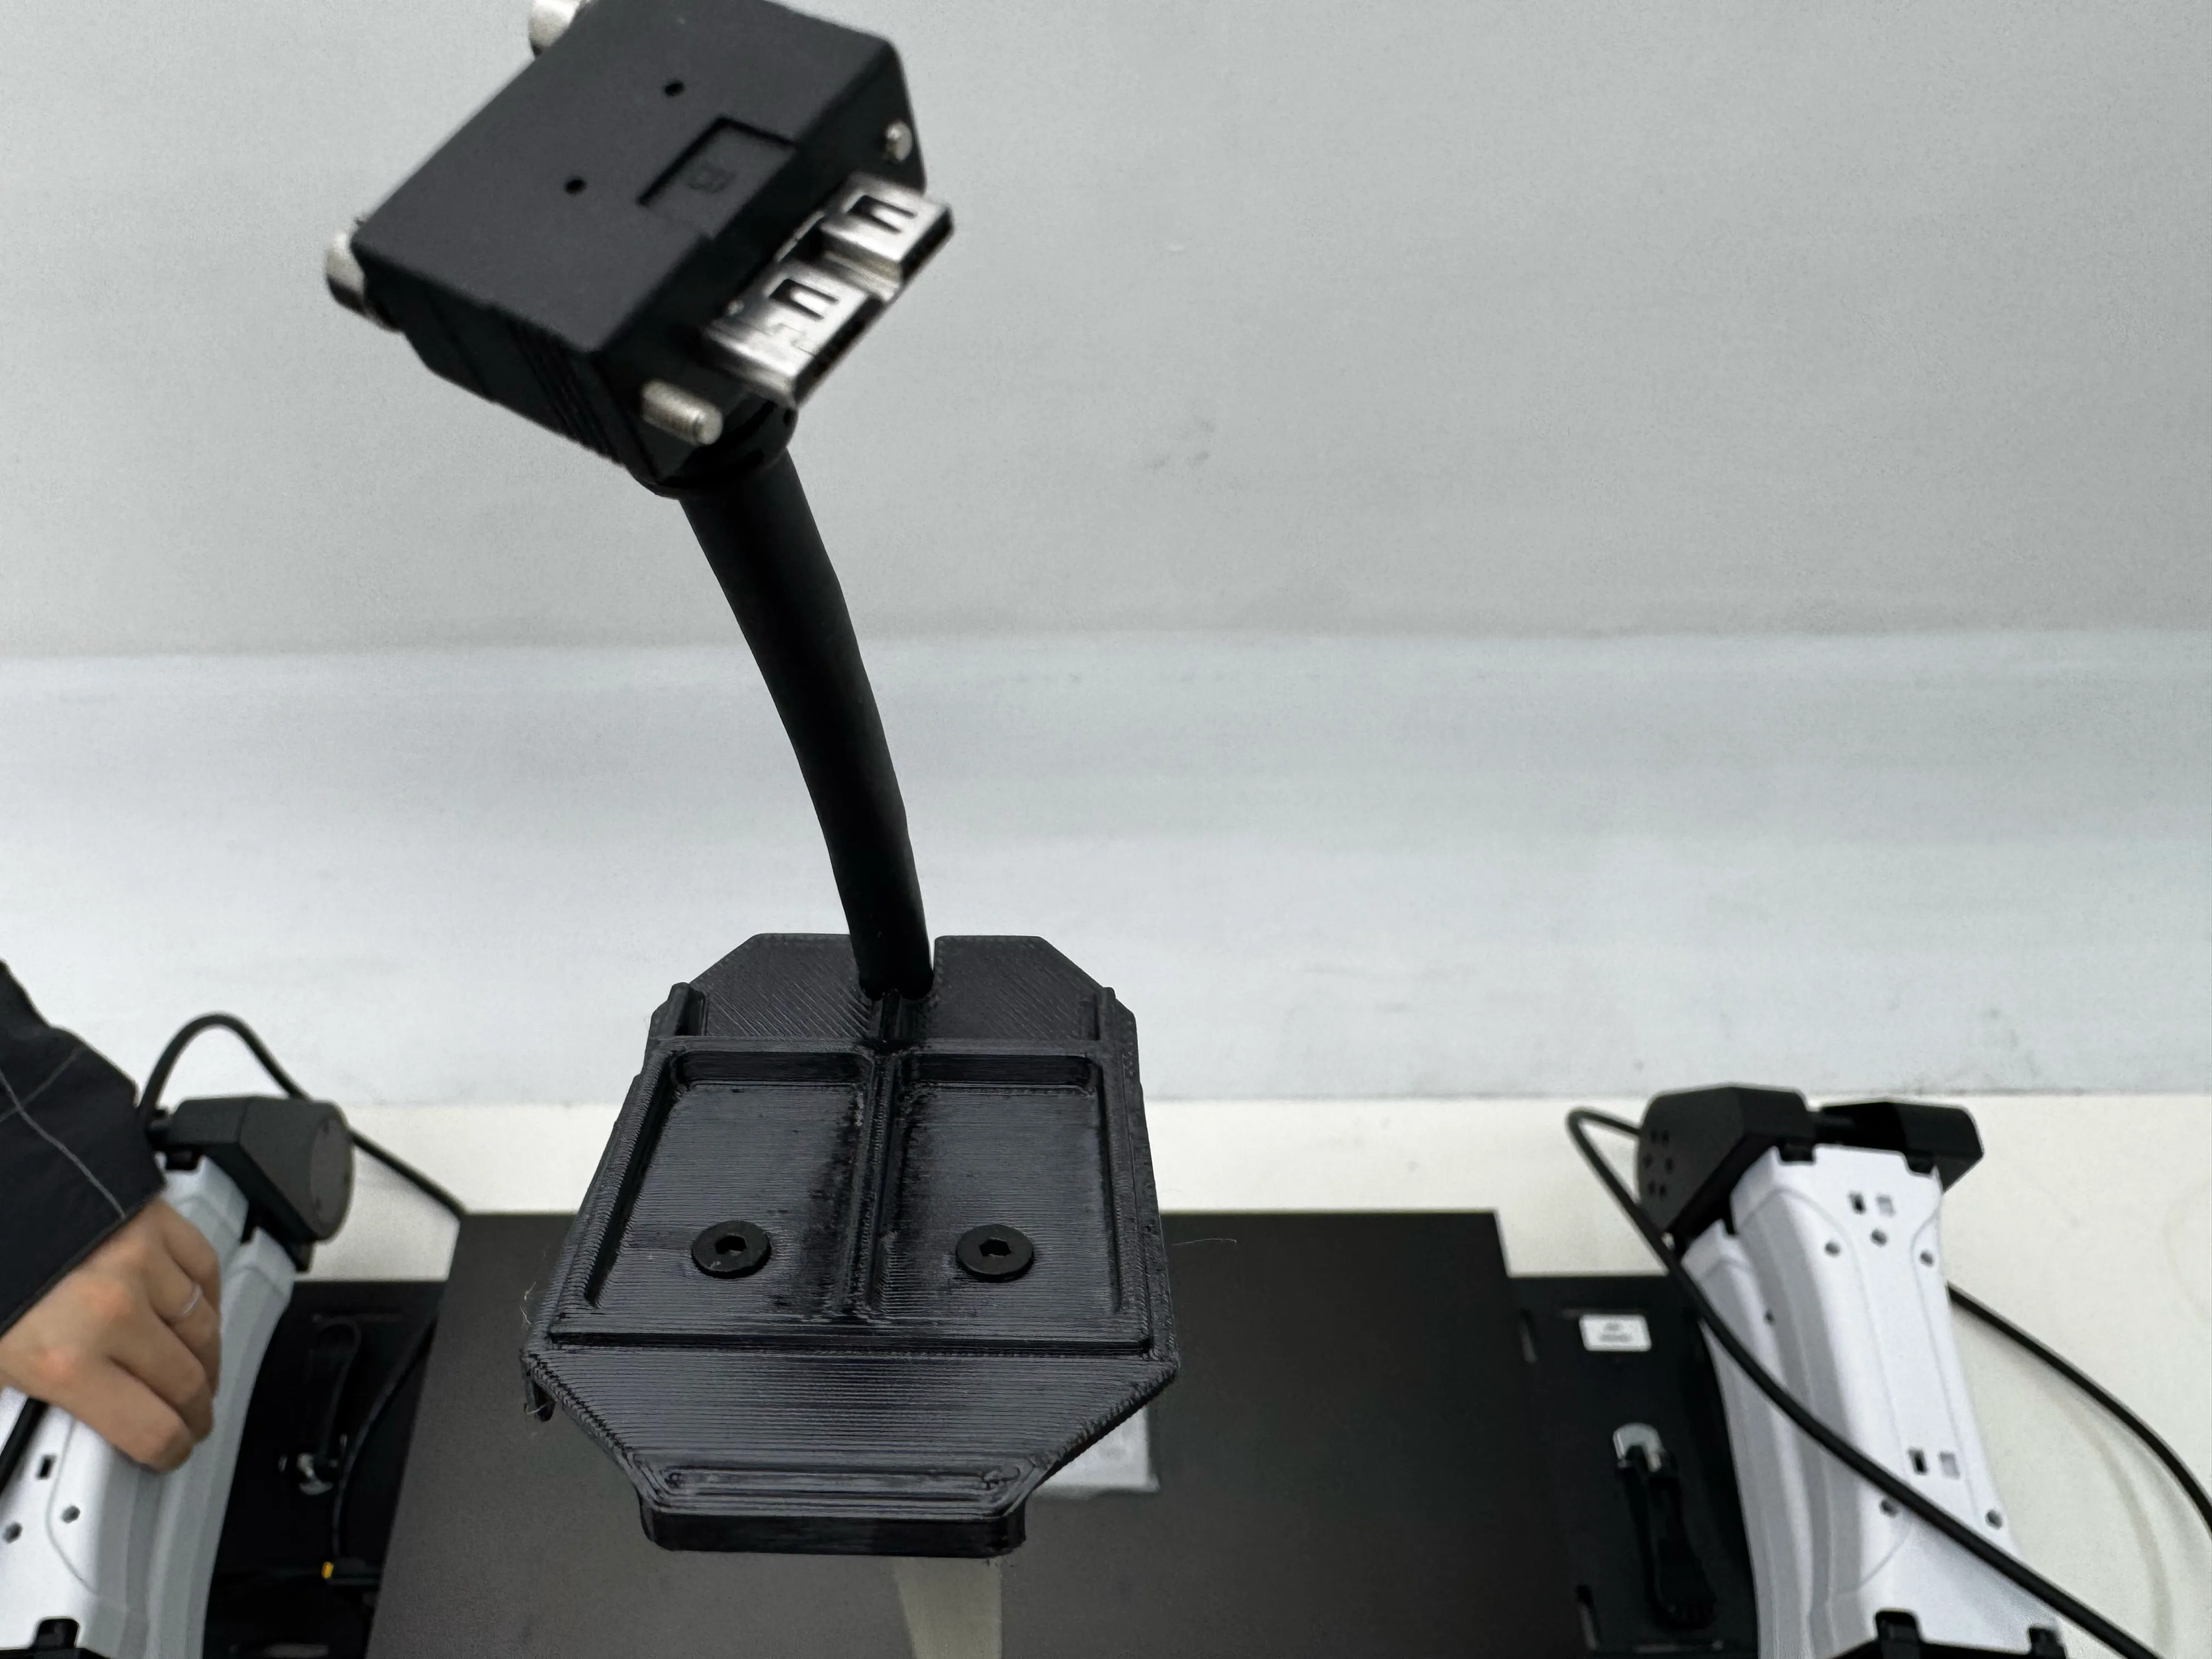
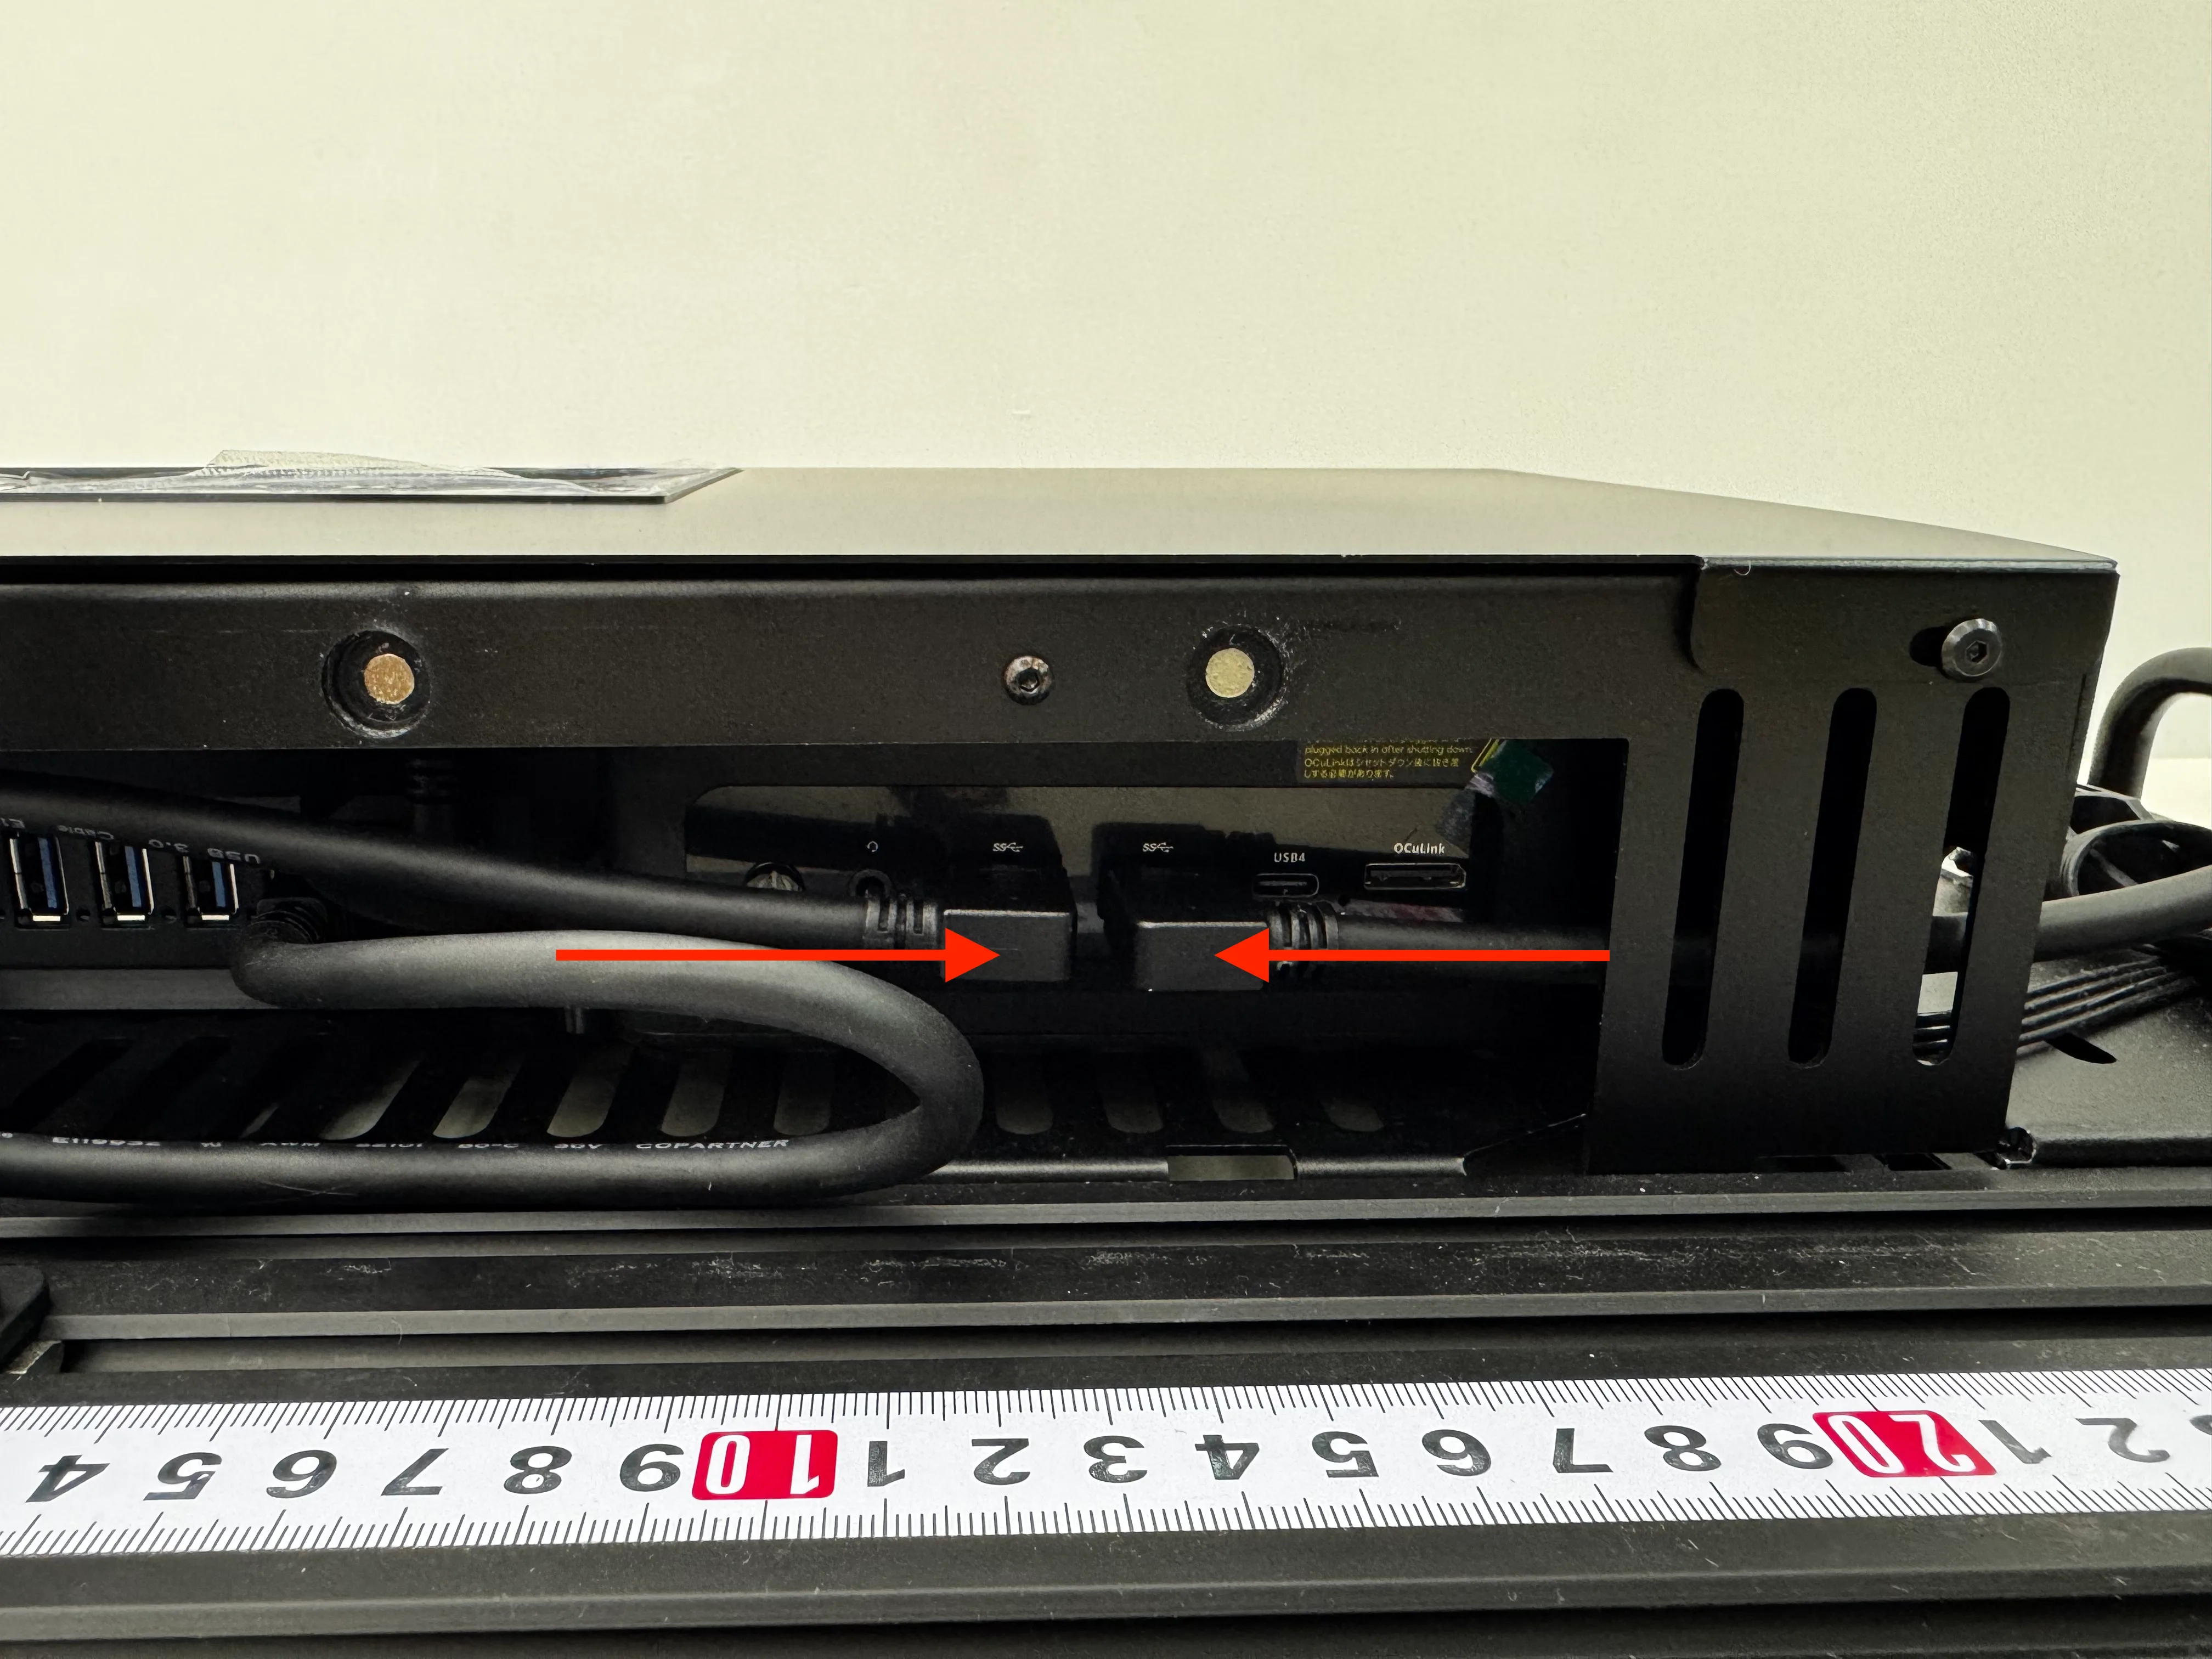
| Camera — top center | 1× camera on center vertical post, connects to USB Hub |
| Cameras — arm-mounted | 2× wrist cameras routed through side holes to Mini PC |
| On-board Mini PC | Pre-installed Ubuntu, connected via USB to cameras and CAN adapters |
| USB Hub | Mounted inside front panel; center camera plugs into leftmost port |
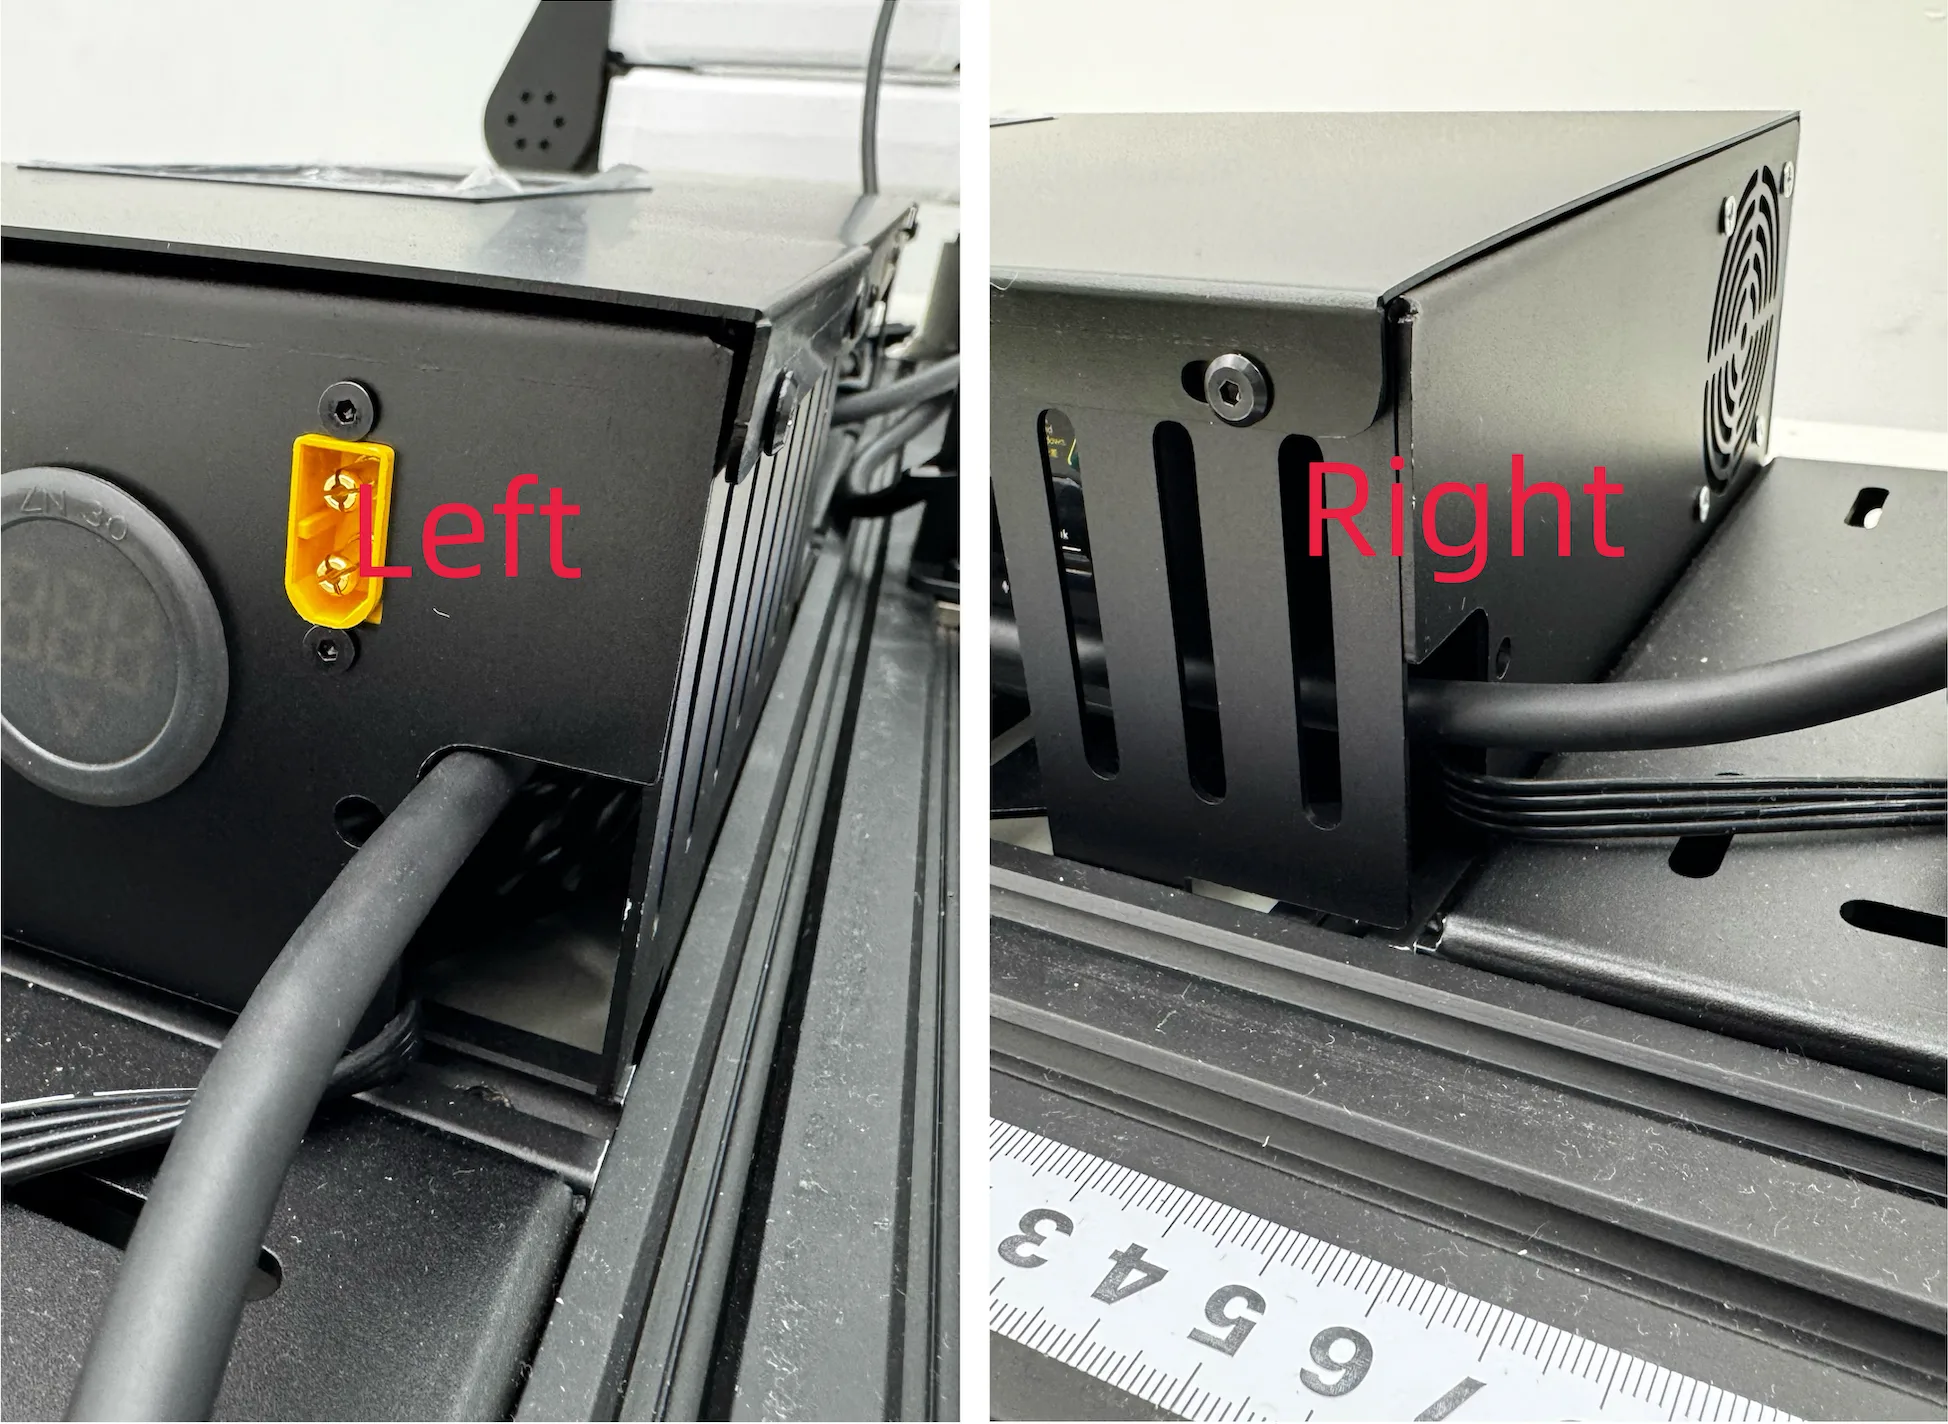
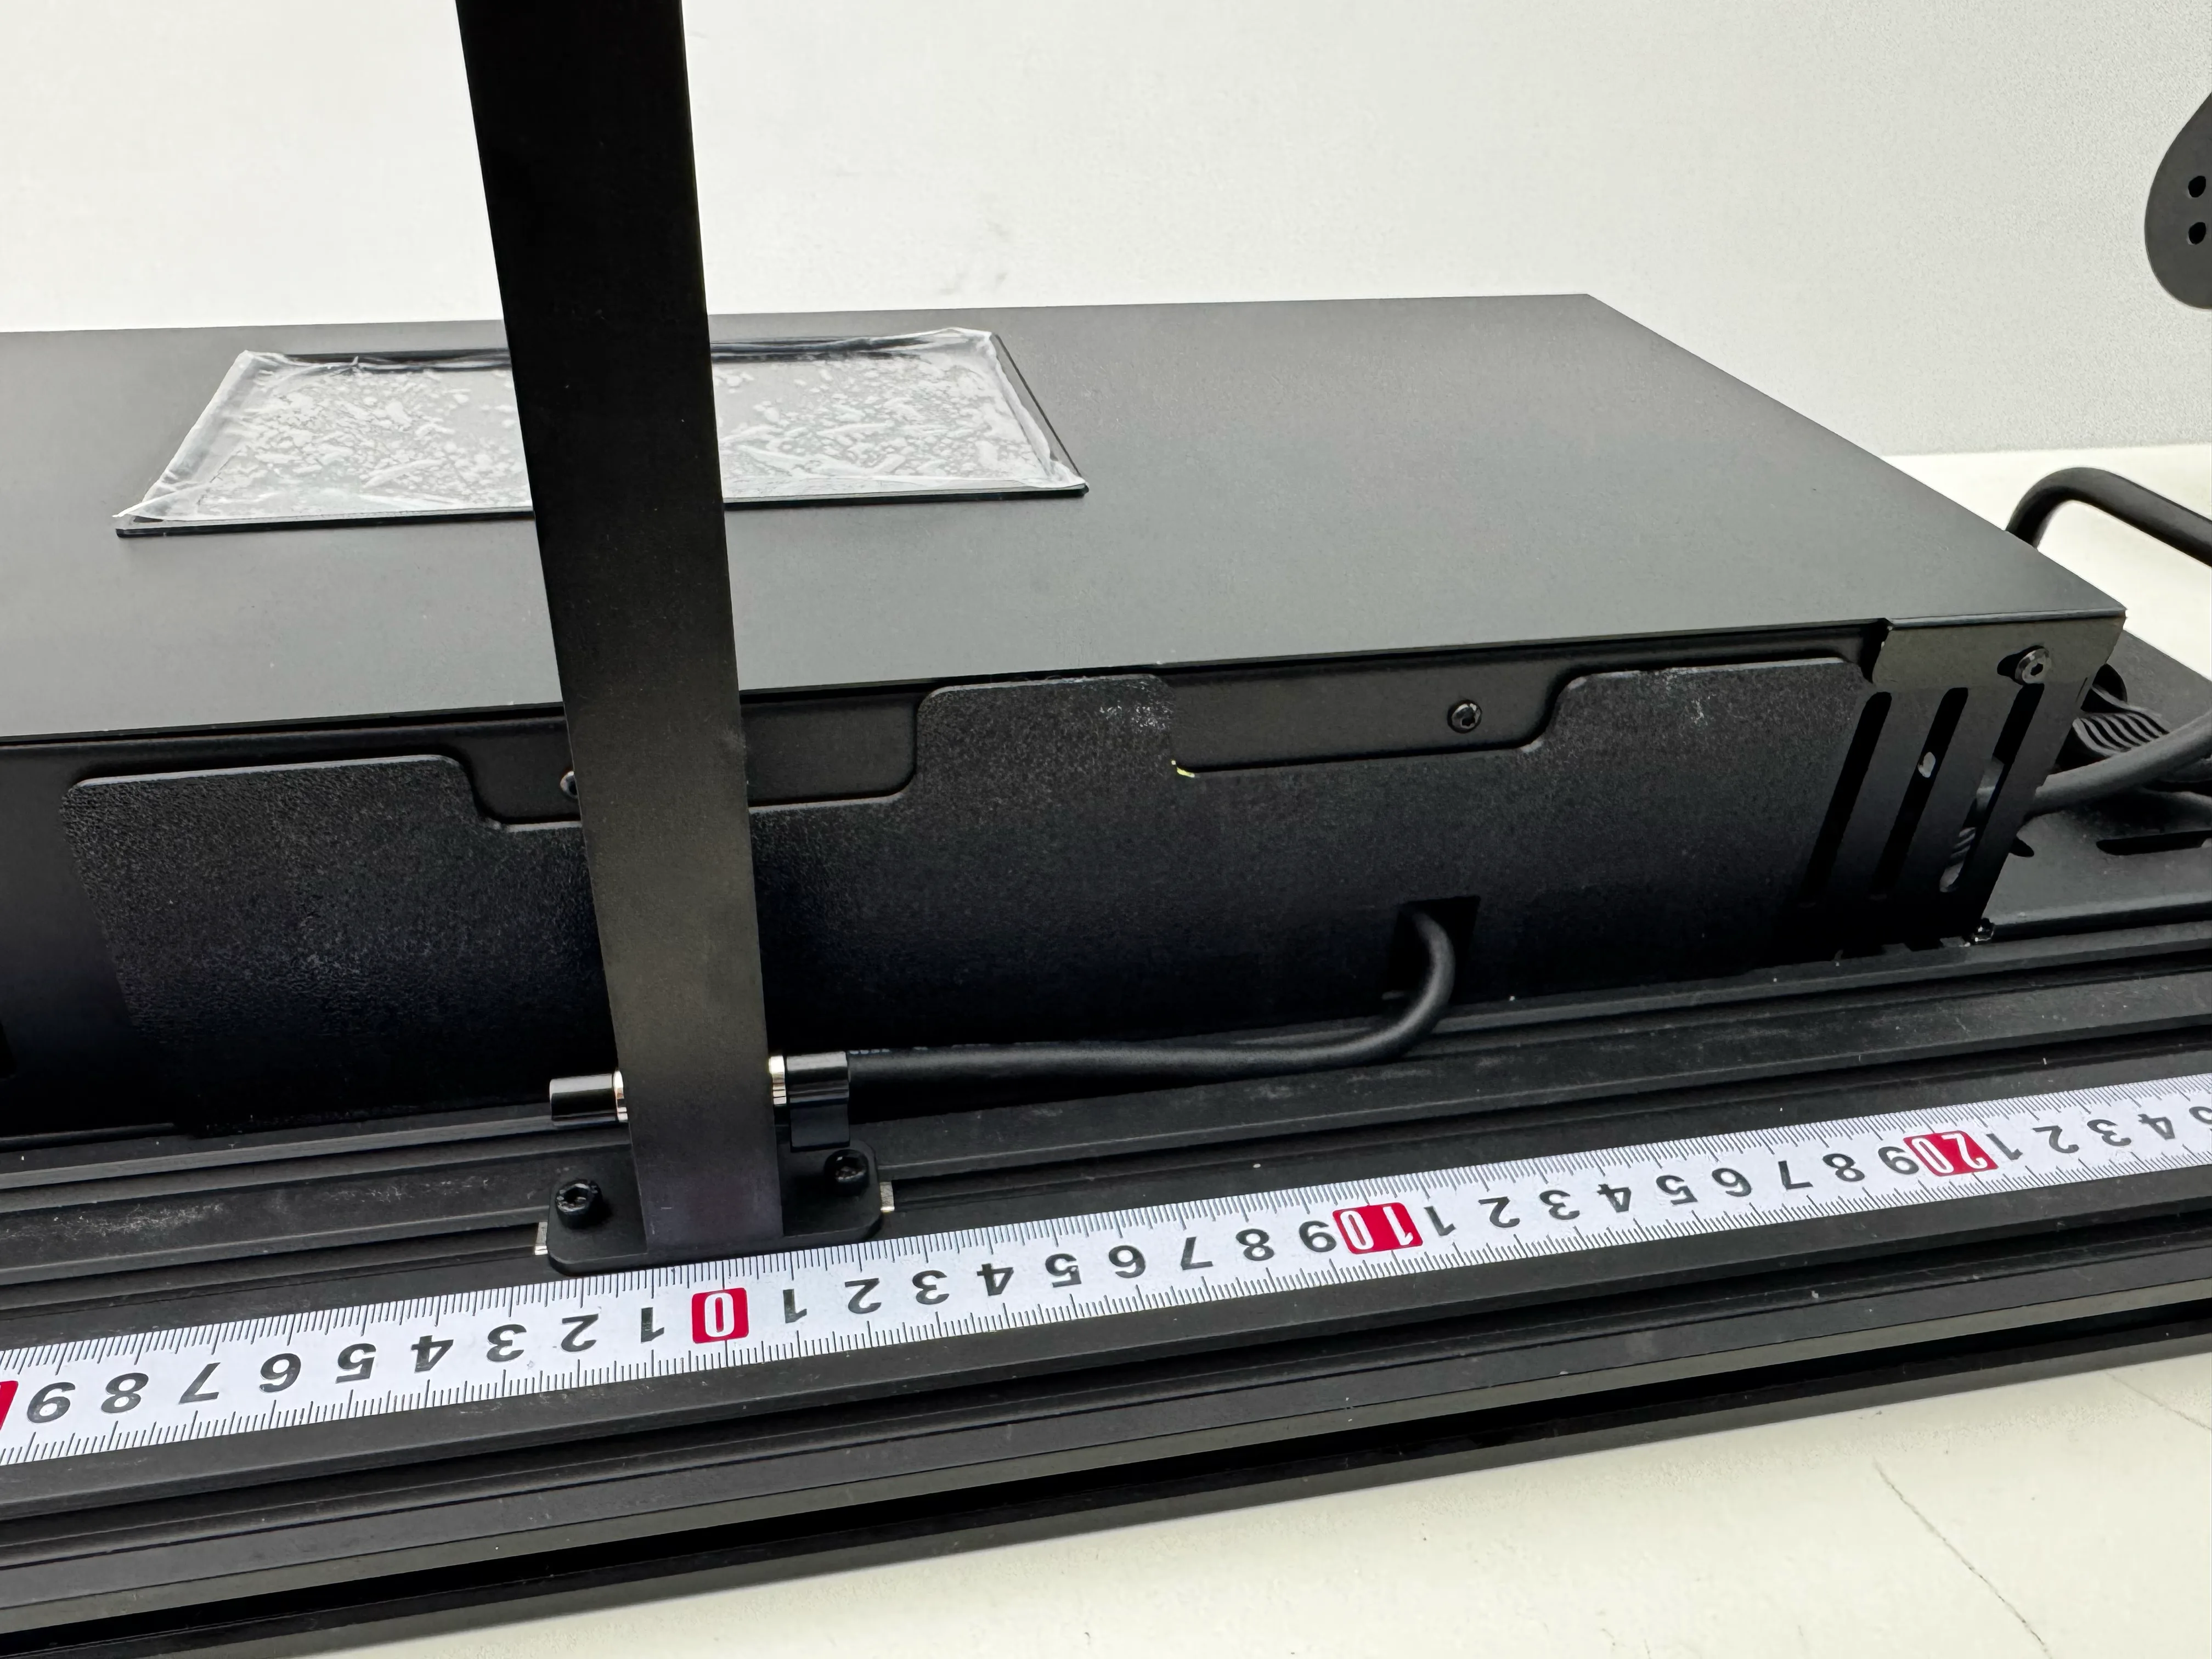
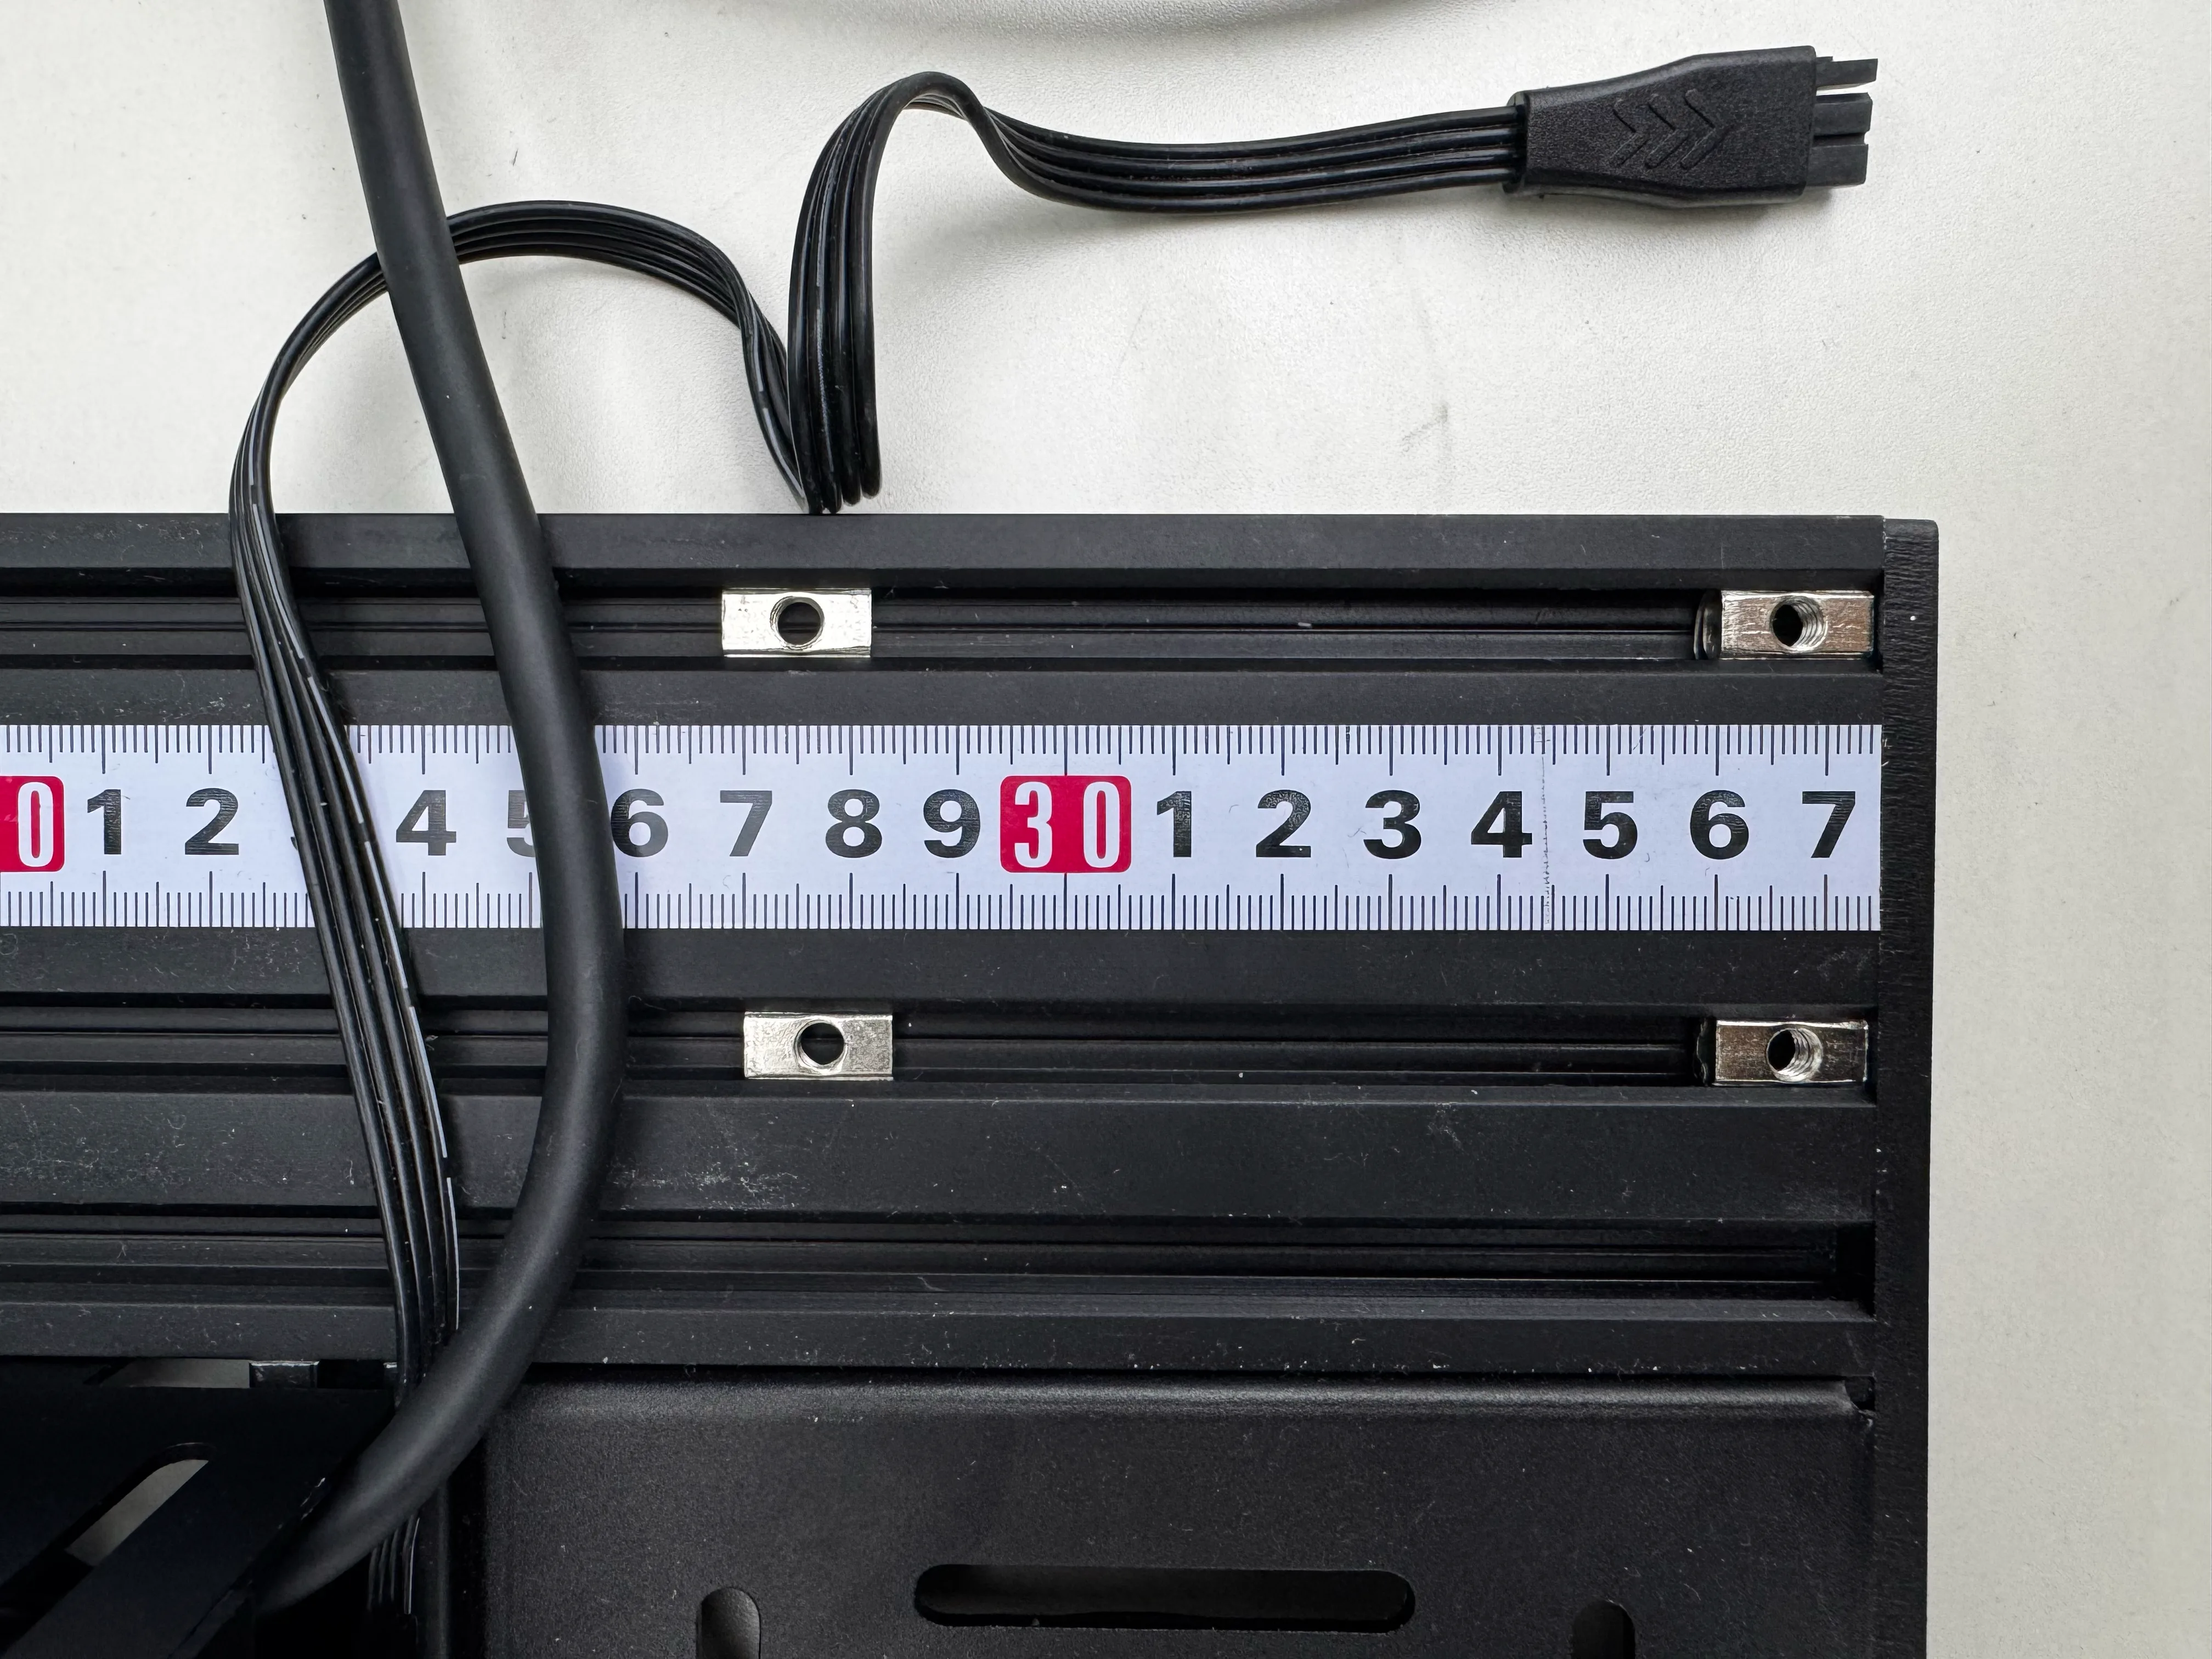
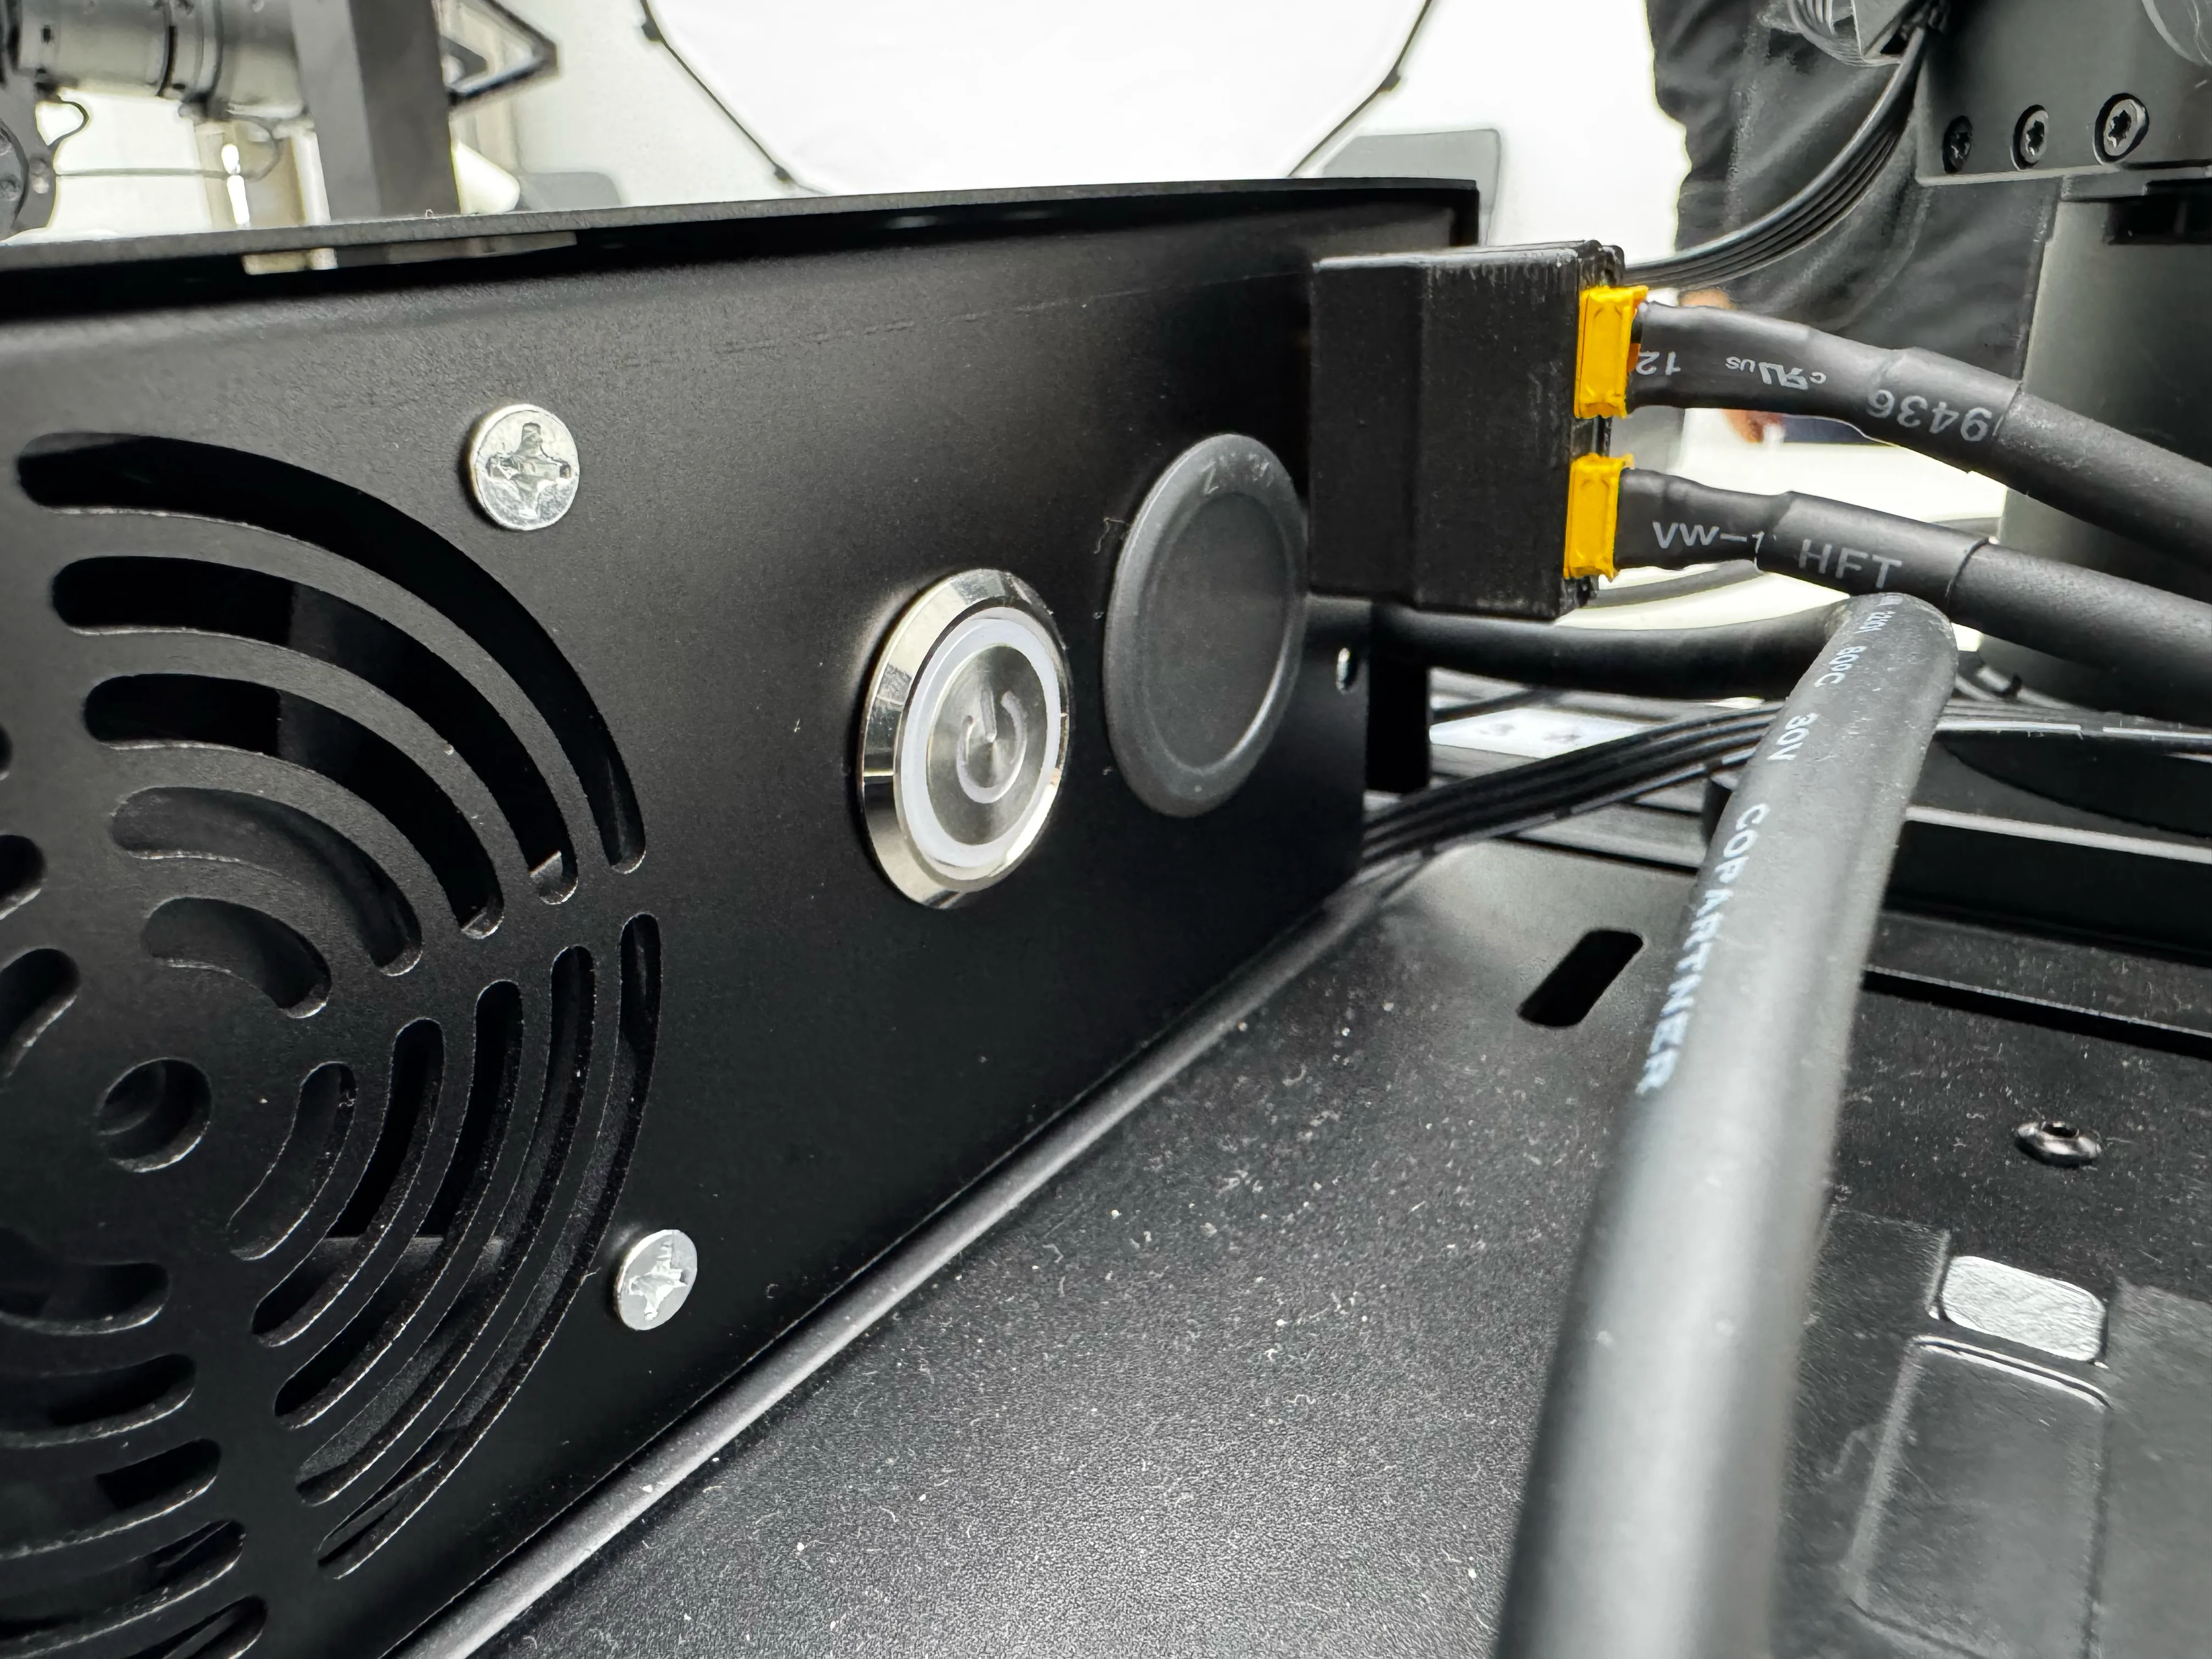
| Power distribution | XT30 (2+2) cables supply each arm from the YAM Box power rail |
| Power input | Dual XT30U-F adapters combined into parallel connector |
Pre-installed Software
The YAM Box ships with Ubuntu pre-installed on the on-board Mini PC.
| Item | Value |
|---|---|
| OS | Ubuntu (latest pre-installed image) |
| Default password | root (newer units) or 123 (early units) |
First boot
Connect a monitor and keyboard to the Mini PC's HDMI/USB ports on the rear panel to log in for the first time. Change the default password after initial setup.
Assembly Guide
Document: Standard Operating Instructions for YAM Box Assembly V1.0 (2026/4/23)
For the Bill of Materials (BOM), refer to the printed sheet included in the carton.
Step 1 — Middle top camera
Open the front cover. Secure the camera mount to the center mount base using thumb screws. Plug the camera cable into the leftmost port on the USB Hub. Fasten the top camera with 2× M3×6 screws.
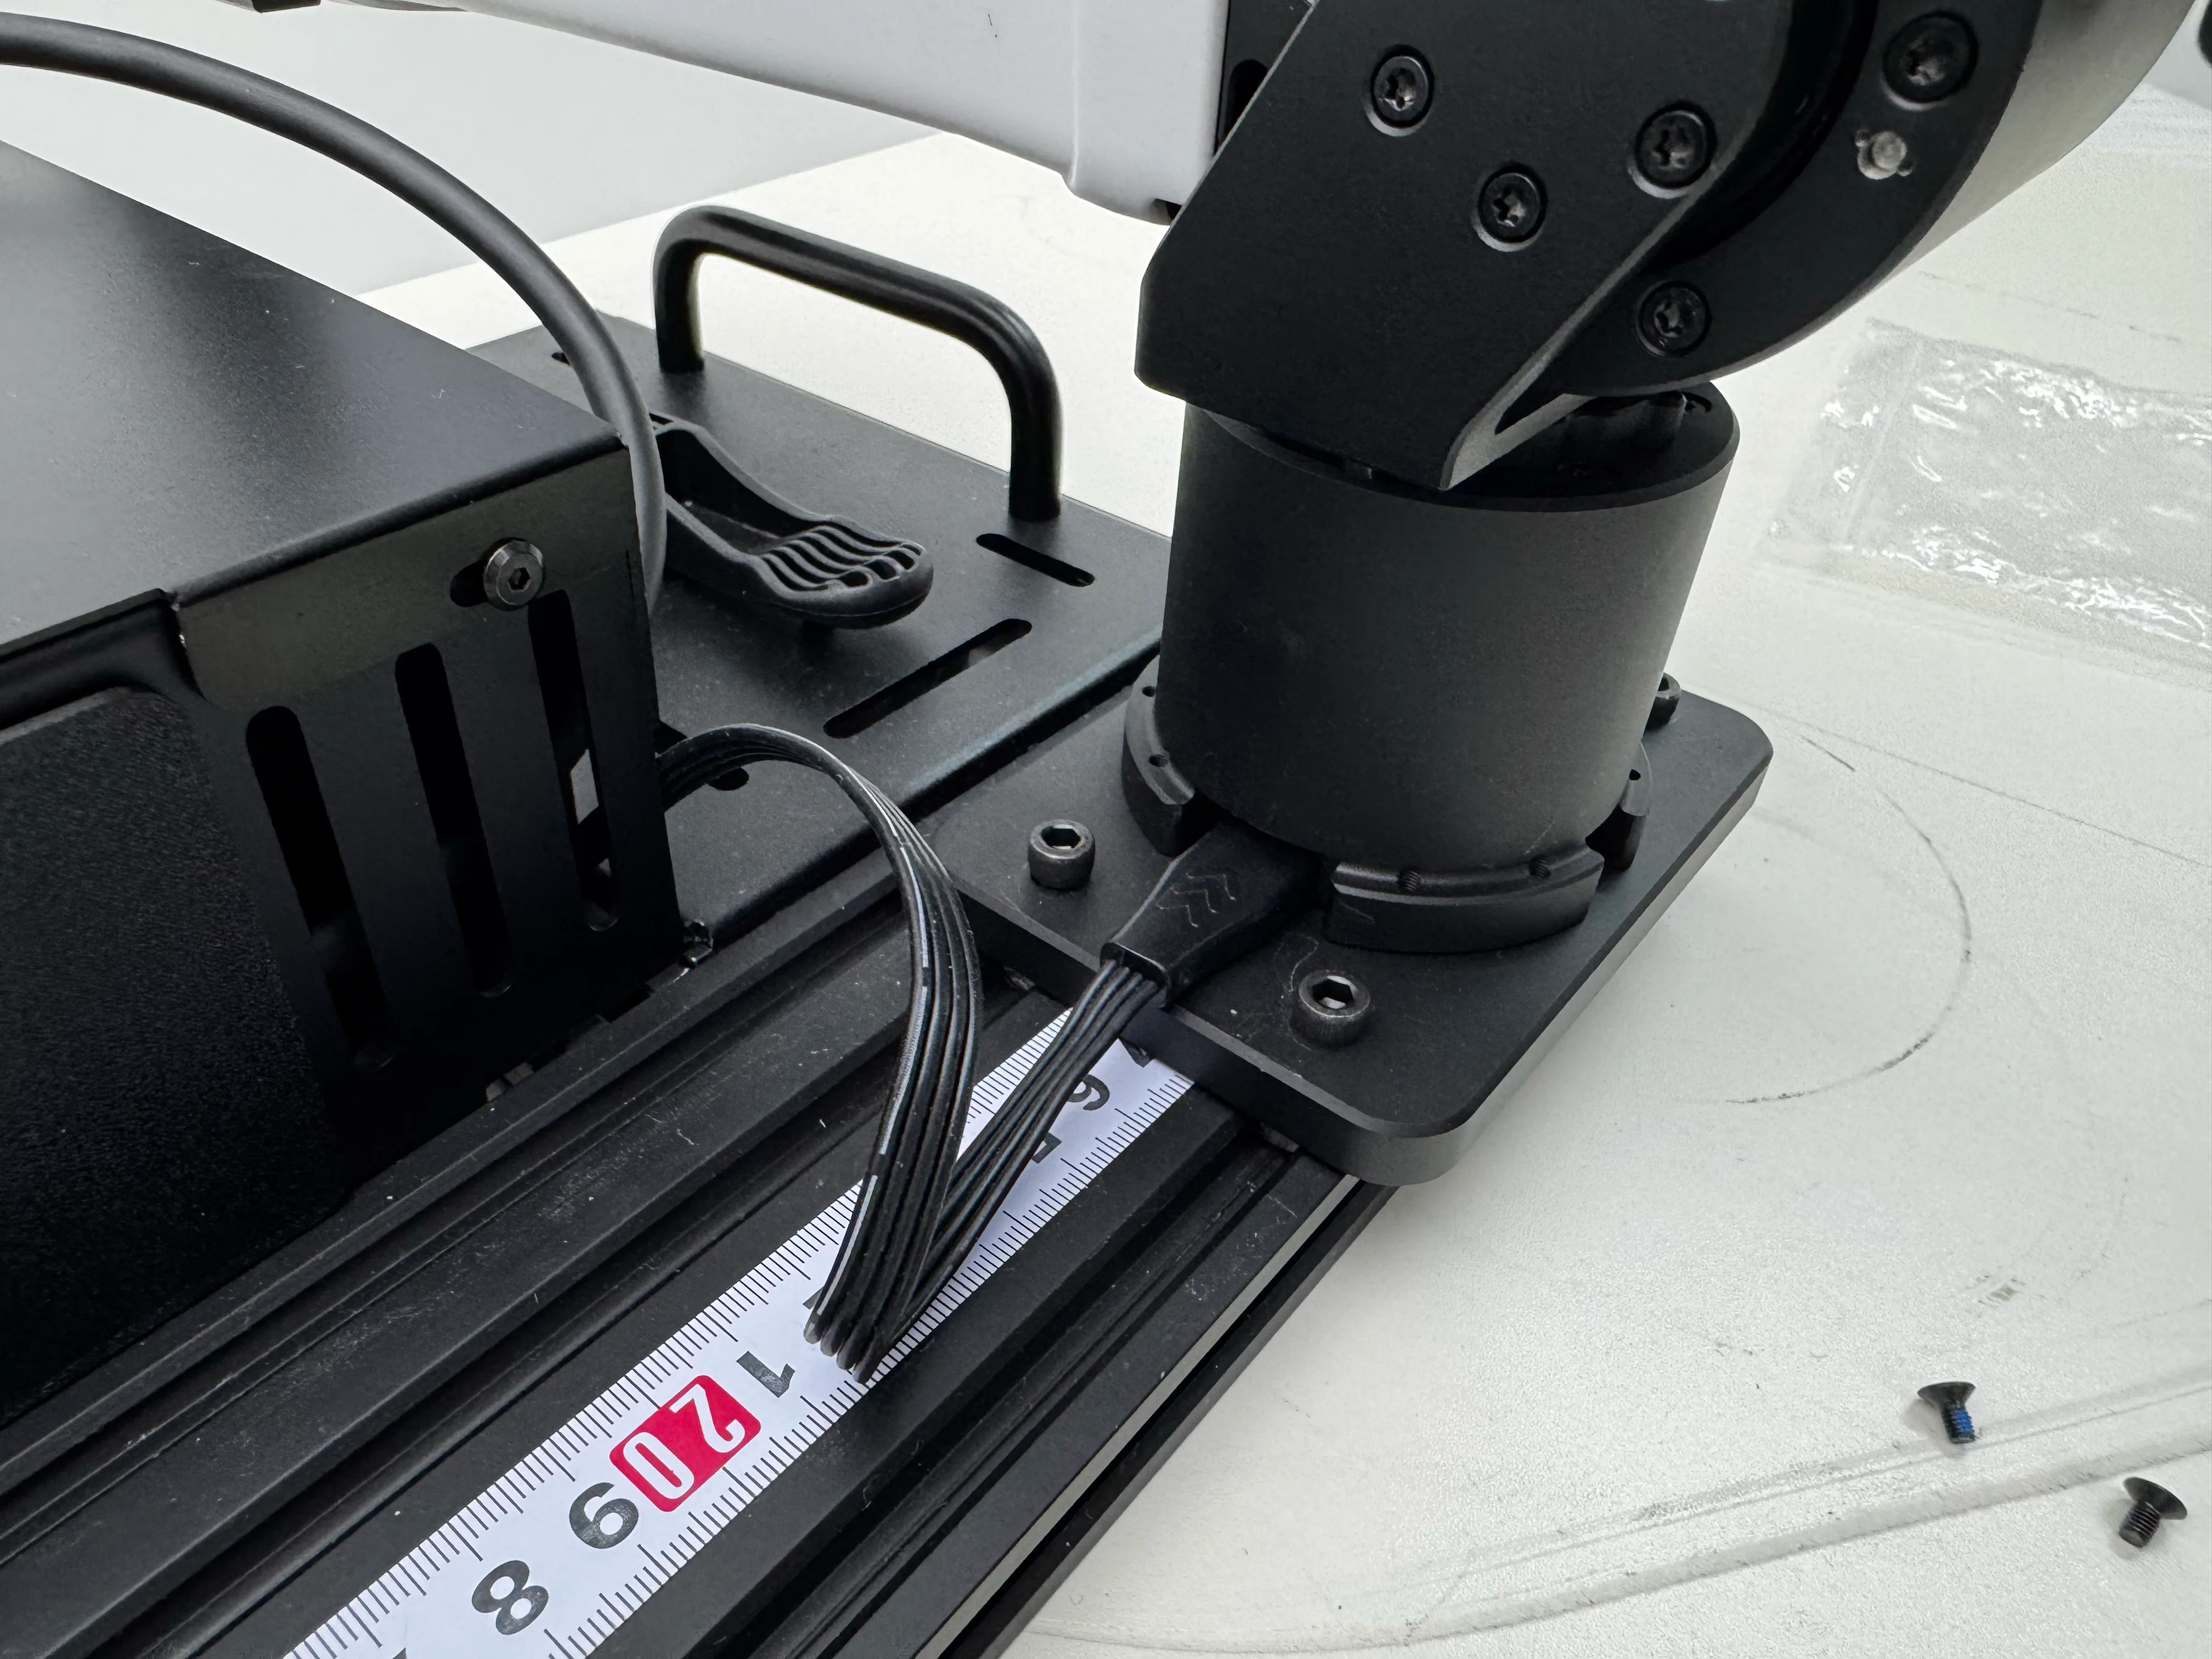
Step 2 — Side arm cameras (cable routing)
Route the two arm camera cables through the holes on each side of the enclosure. Plug their USB ends into the USB ports on the right side of the Mini PC.

Step 3 — Close front cover
Close and secure the front cover.
Step 4 — Mount follower arms
Place 4× T-nuts on each side into the slots of the front two rows. Mount both follower arms to the left and right sides using M5×16 screws (4 screws per arm).
Step 5 — Power cables to arms
Plug the XT30 (2+2) cables on both sides of the YAM Box into the corresponding power ports on each robotic arm base.
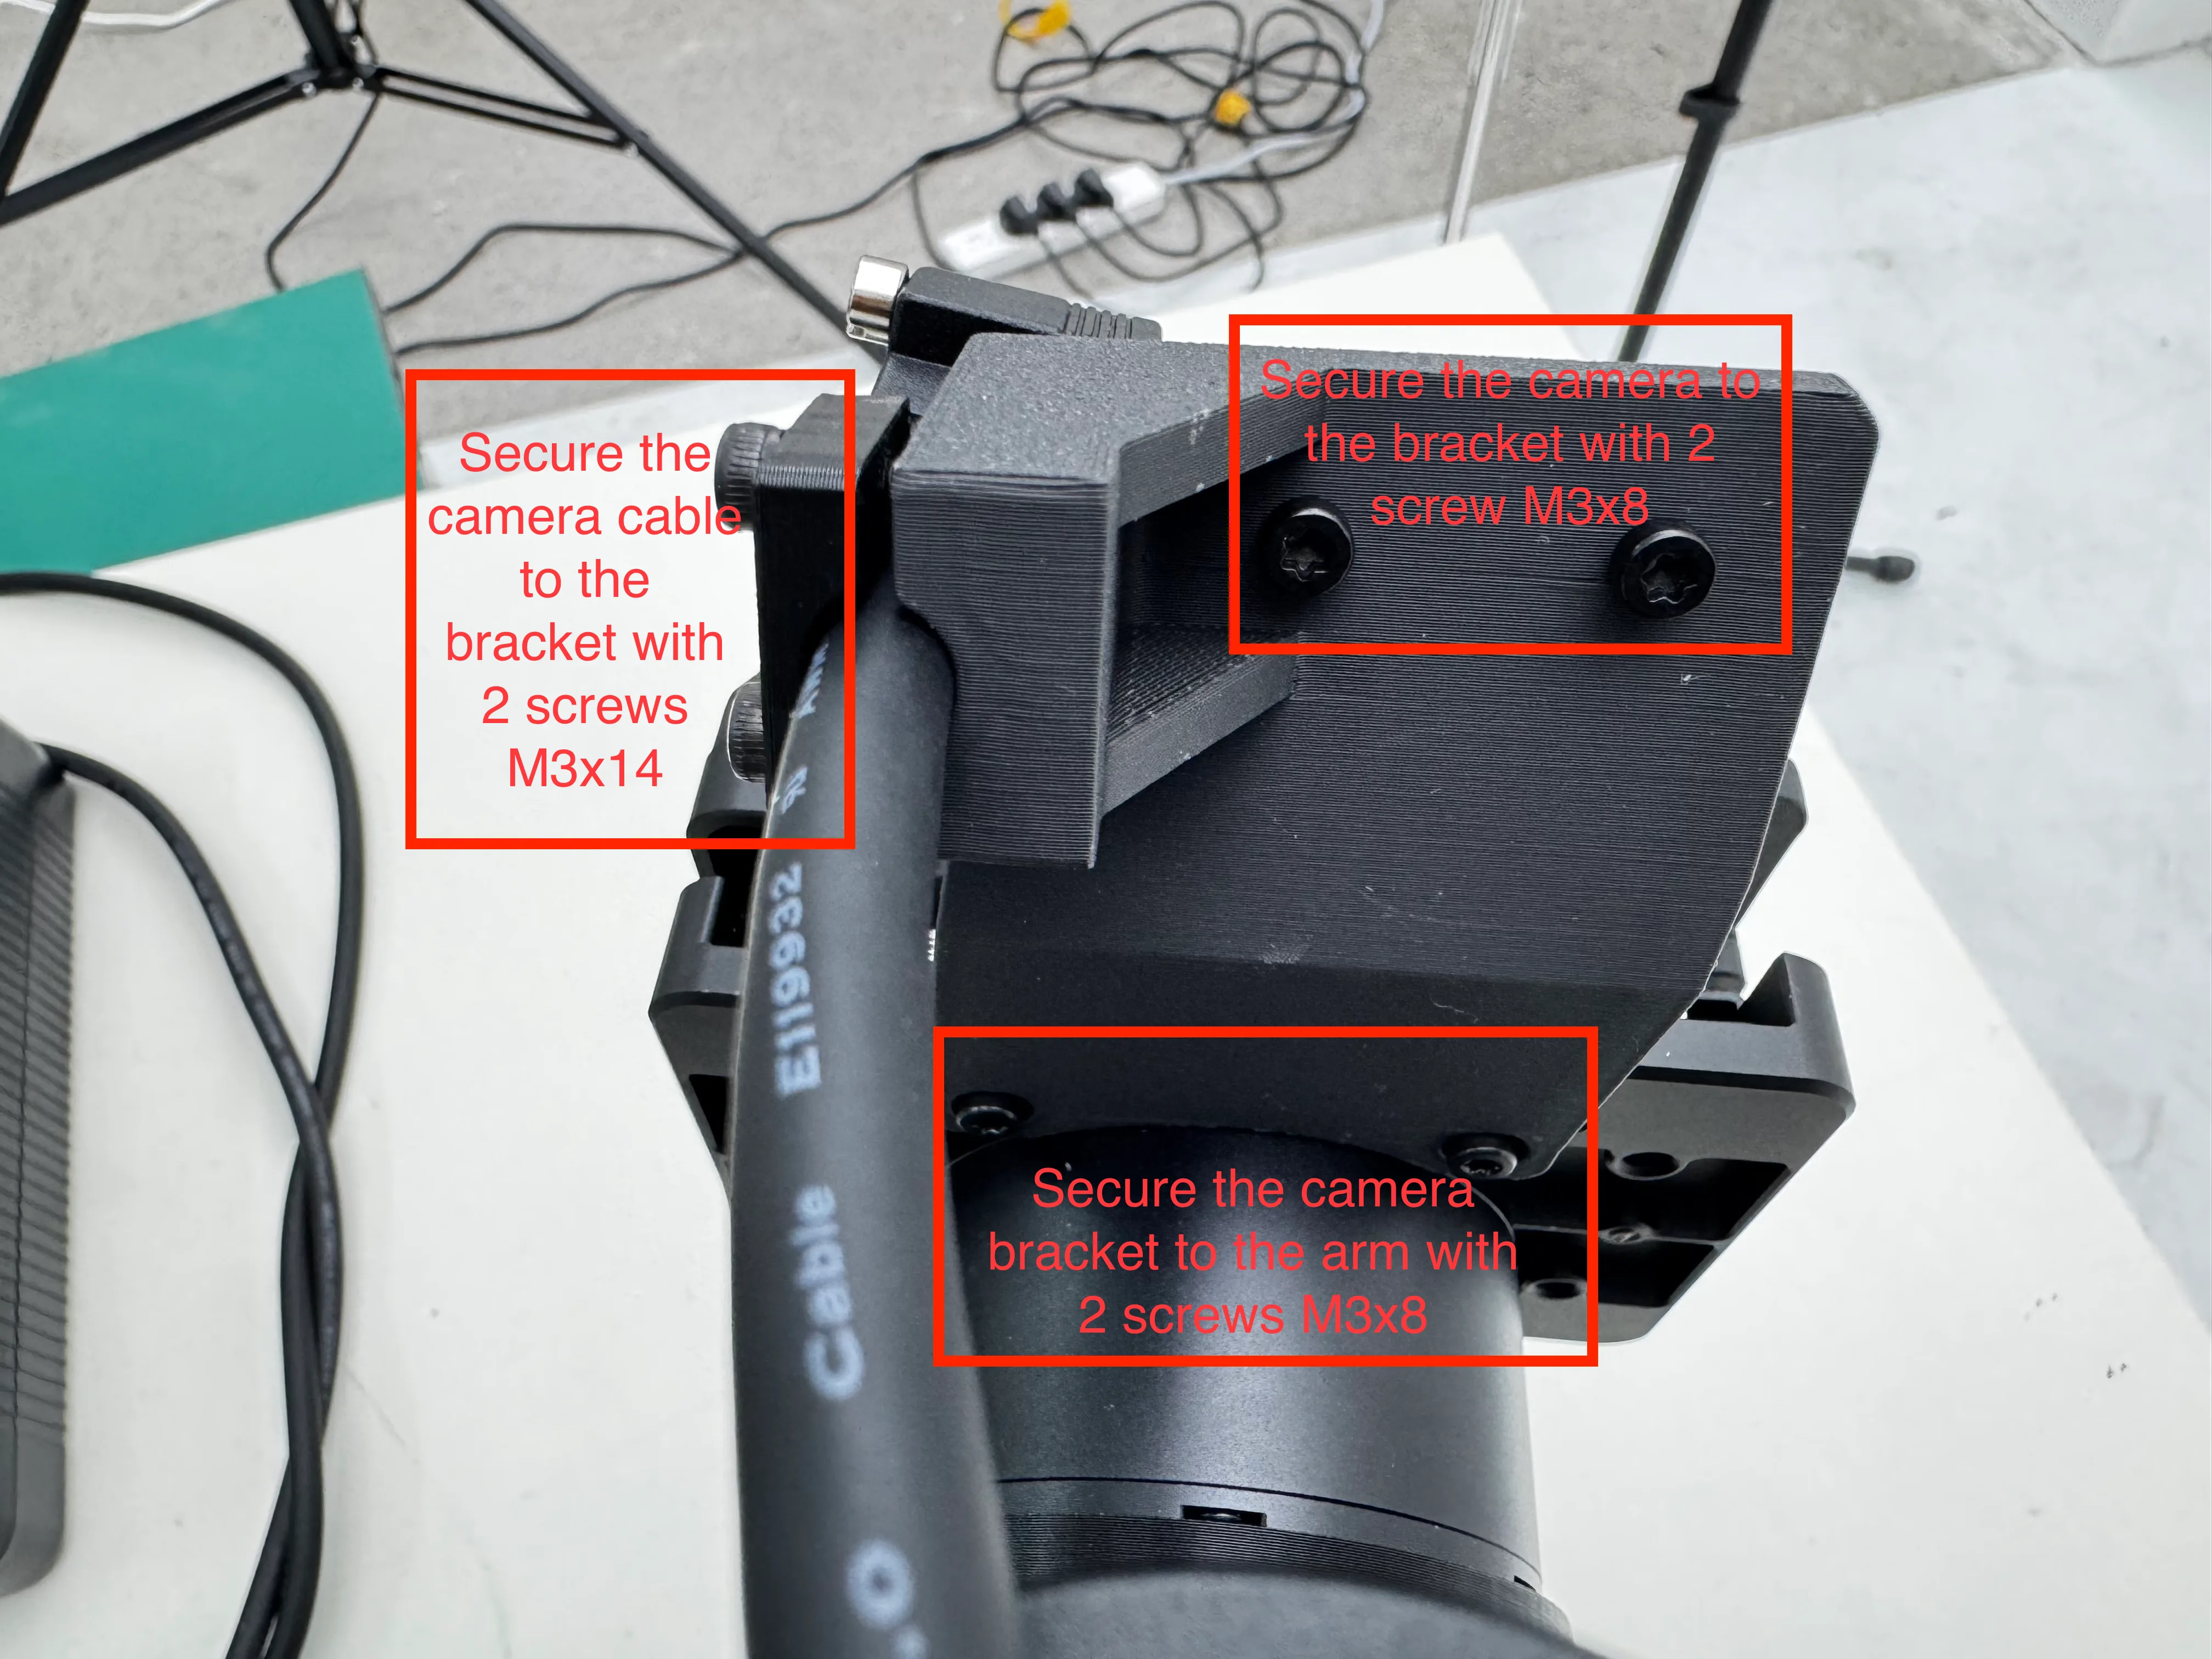
Step 6 — Arm camera brackets
For each arm-mounted camera:
- Secure the camera bracket to the arm with 2× M3×8 screws
- Secure the camera cable to the bracket with 2× M3×14 screws
- Secure the camera to the bracket with 2× M3×8 screws

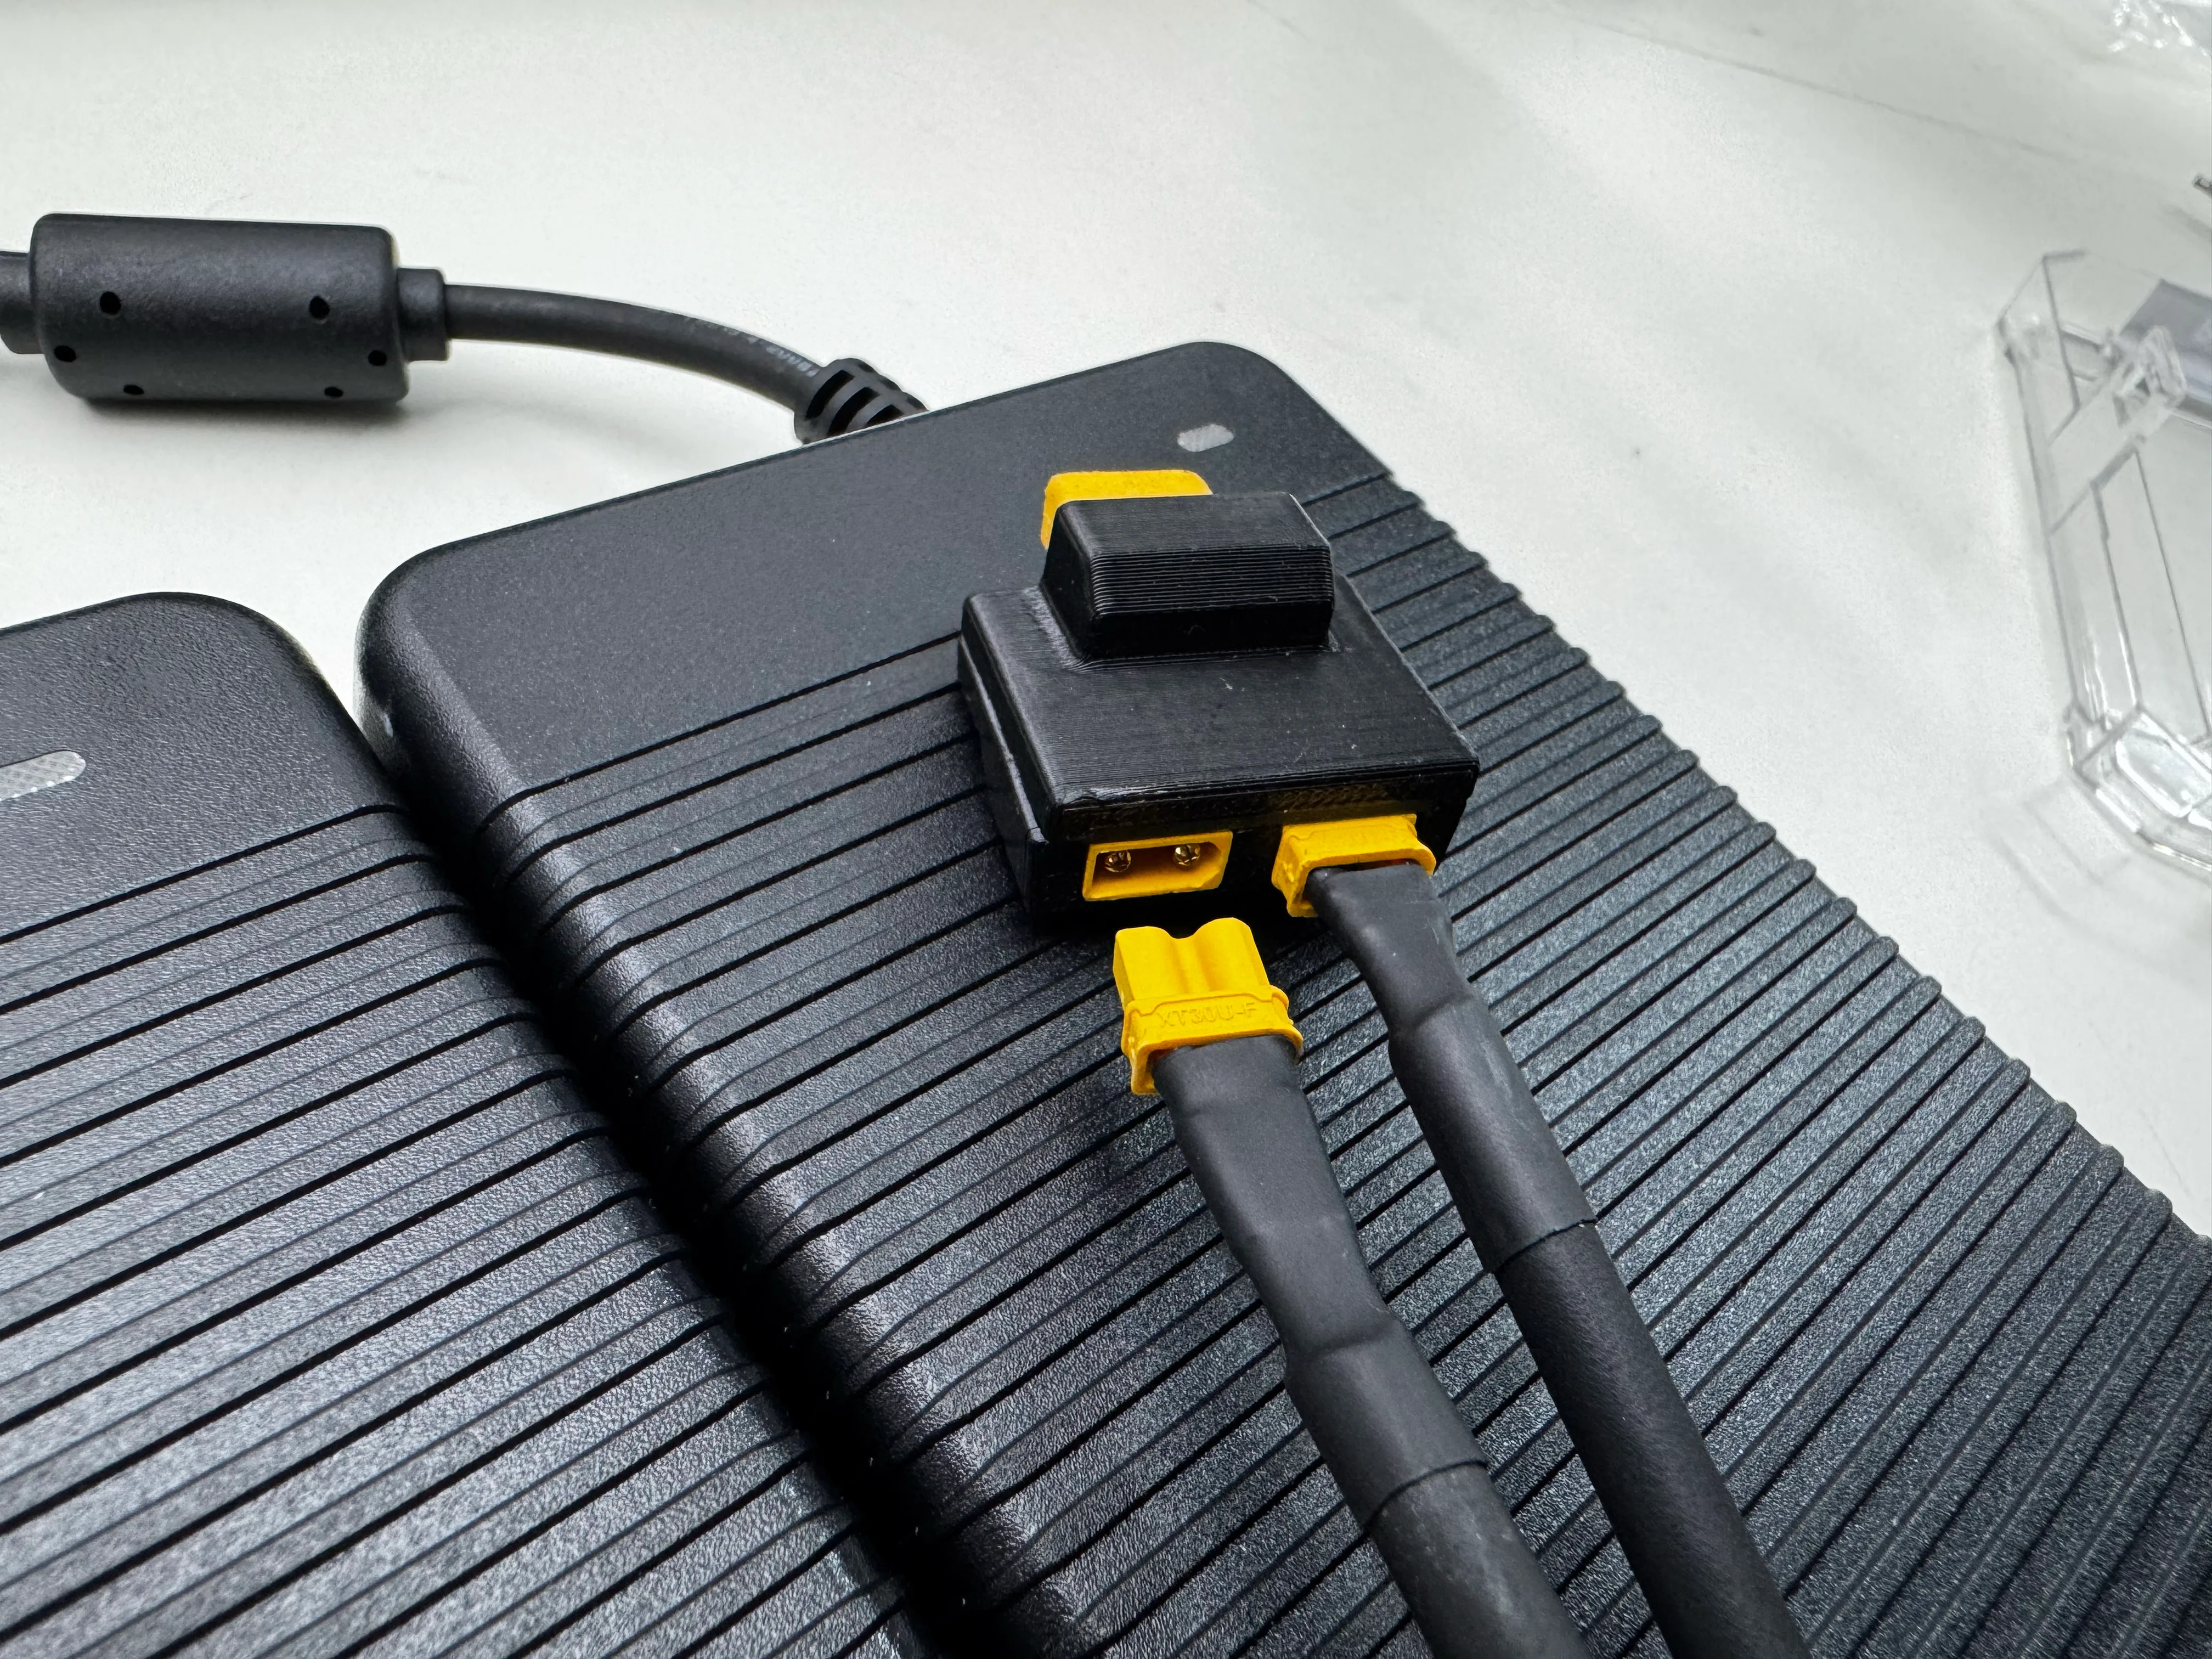
Step 7 — Main power connection
Connect the two XT30U-F adapter plugs to the power parallel connector first, then plug the combined adapter into the power input port of the YAM Box.
Step 8 — Power on
Plug in the power supply and switch on. The Mini PC will boot automatically — the YAM Box is ready to use.
General Assembly Notes
Before powering on
After all wiring is complete, verify every connection is firm and there are no loose, mis-connected, or shorted cables before turning on the power.
| Rule | Details |
|---|---|
| Fastener torque | Tighten to spec — neither loose (fall-out risk) nor over-torqued (thread strip) |
| Cable routing | Route neatly, even zip-tie spacing; no tangling, sharp bends, or pinching |
| Missing parts | Do not force assembly with wrong or damaged hardware — contact support@i2rt.com |
| Post-assembly | Clear all packaging and leftover hardware from the workspace before operation |
Quick Start Demo
After assembly, YAM Box runs the same SDK as a standalone YAM arm. Test with:
python i2rt/robots/get_robot.py --channel can0 --gripper linear_4310The arm should float in zero-gravity mode inside the enclosure. Push it through reachable space to verify nothing collides with the walls or top frame.
Then try the Python API:
from i2rt.robots.get_robot import get_yam_robot
import numpy as np

robot = get_yam_robot(channel="can0")
print(robot.get_observations())
robot.command_joint_pos(np.zeros(7))
robot.close()
For the full SDK reference, MuJoCo / Viser visualizers, and gravity-comp tuning, see the YAM Arm product page.
Pricing
Starting at $3,500. Contact sales@i2rt.com for custom configurations.
Stay Updated
- Discord
- GitHub — watch the repo for SDK releases
- Email support@i2rt.com